October 17, 2025
Prompting Guide: Working with Flux from Idea to Schematic
Share
BuildWithFlux


If you haven’t seen what’s changed, read the launch blog for the full story.
This guide shows how to collaborate with Flux at the schematic stage. You’ll learn how to describe your intent clearly, guide the AI through design decisions, and review results so each iteration gets smarter.
Flux isn’t magic — it’s more like a fast, thoughtful engineering intern. With the right direction, it can turn your idea into a manufacturable schematic while you stay in control of the design. Flux also can't generate a full board in one go. Instead, make sure to split the process in steps and use AI to get you to the next stage. Let’s start by learning how to work with Flux to:
This workflow allows you to move fast while keeping control. The sections below walkthrough how to write great prompts.
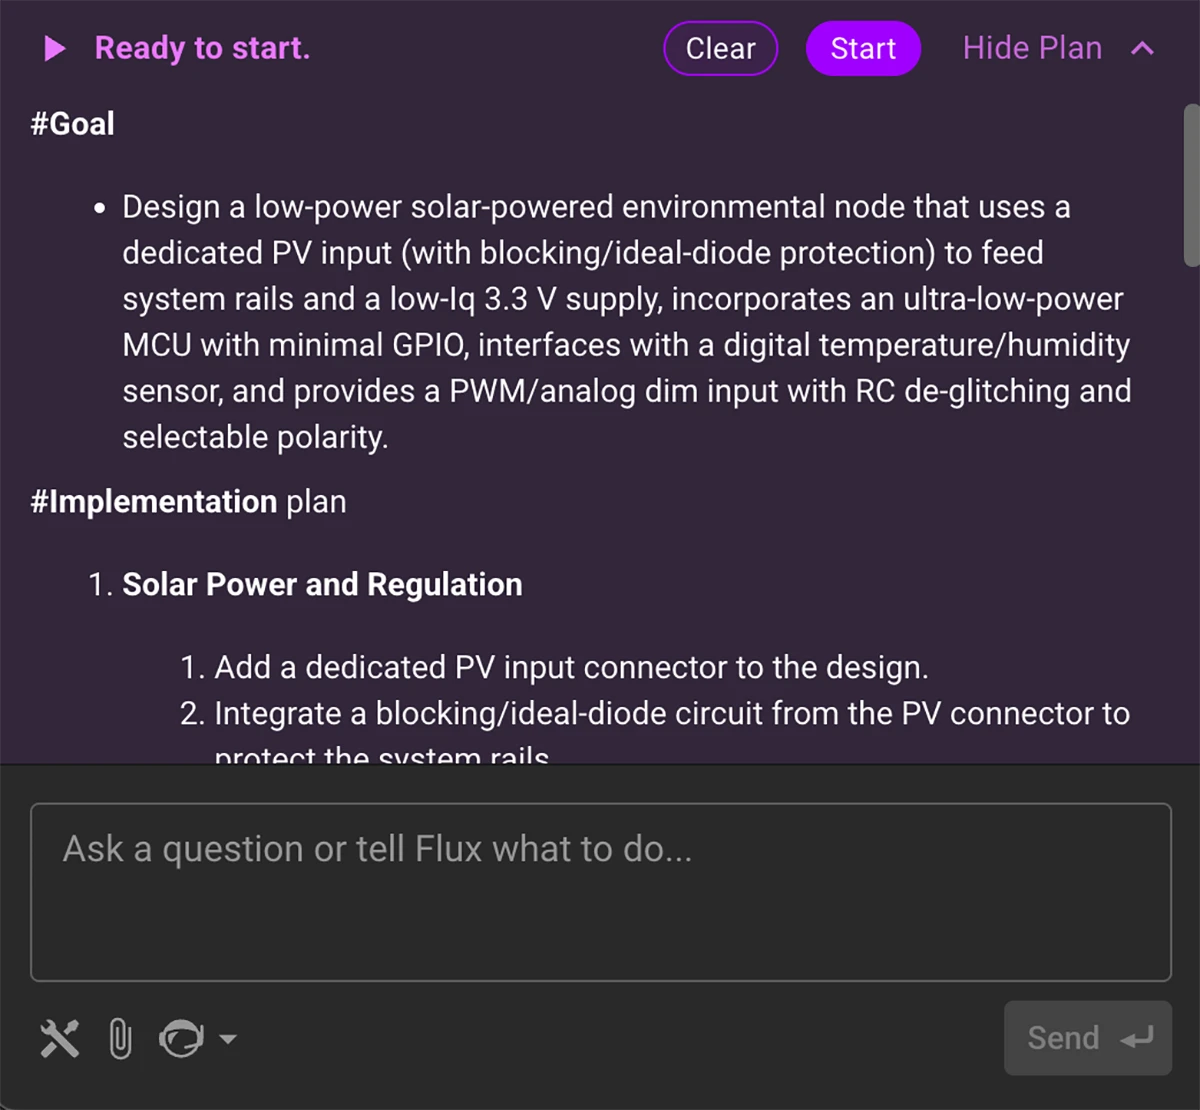
Start by describing what you're building, why it matters, and who it's for. This gives Flux enough context to generate a reasonable plan that typically includes system-level architecture. After the initial prompt, with planning mode activated, Flux will generate a plan you can approve or modify. Then, click start to watch it work.
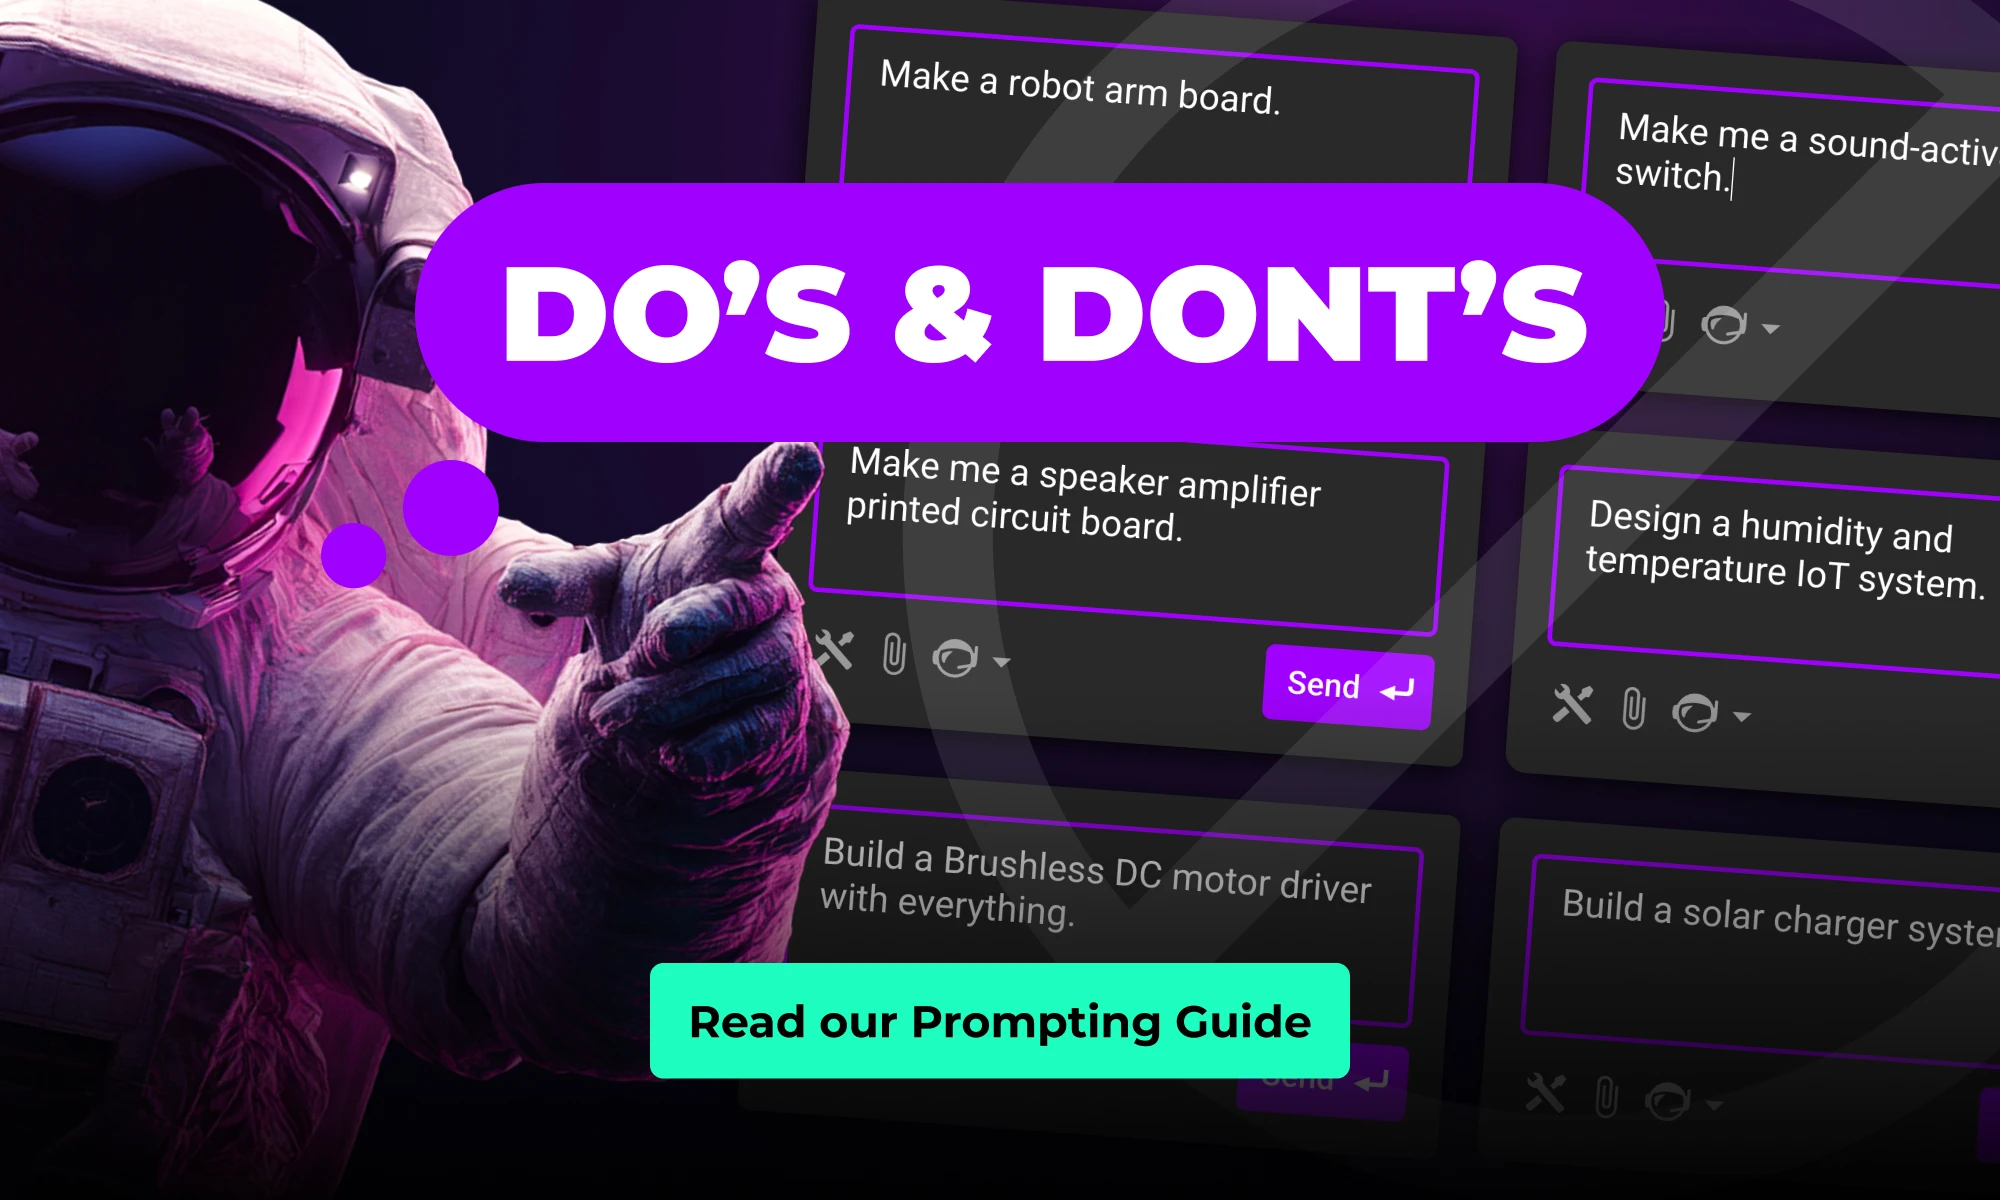
The following prompt template works well for kicking projects off because it sets intent (why), scope (what), and constraints (how).
Use this formula:
Make me a {what it is} with {connectivity}, powered by {power} for {application}.
Followed by detailed info:
{detailed what it is} with {detailed connectivity}, powered by {detailed power}.
Example:
Make me a {portable stereo Class-D speaker} with {Wi-Fi and Bluetooth}, powered by {a multi-cell Li-ion/LiPo battery} for {consumer use}.
It should be a compact stereo system with dual Class-D amps (2×10–25 W), basic DSP or MCU tone controls, dual-radio Wi-Fi + BLE (2.4 GHz 802.11 b/g/n plus BLE 5.x), and a Li-ion/LiPo BMS with balancing and pack monitoring.
Tips
The plan that Flux generates typically benefits from more specificity on the systems and subsystems before you approve it. So, be sure to review and make sure everything makes sense before you have Flux start executing the plan. At this stage you can follow Flux’s initial system-level architecture suggestion and let it help you reason through the role of each block, interfaces, and signal flow.
Use this formula for providing more details:
- Power: [voltage rails, current needs]
- Communication: [interfaces between blocks]
- Environment: [thermal, ingress, EMI, etc.]
- Etc.
Design goal: [priorities or trade-offs]
Example:
- Audio block: drives two 10–25 W Class-D amplifiers using a stereo signal path. Includes simple EQ via a low-cost DSP or microcontroller, and volume control from a rotary encoder. Accepts I²S or analog input.
- Connectivity block: dual-radio module (Wi-Fi 802.11 b/g/n and BLE 5.x) for audio streaming and pairing. Includes antenna interface, UART/SPI communication with MCU, and audio over I²S.
- Power block: multi-cell Li-ion/LiPo battery with BMS. Provides 3.3 V rail for logic, 5 V rail for radio, and higher-voltage boost for amplifier rails. Supports charging via USB-C with protection. Battery input with boost converters and LDOs as needed
- Communication: UART/SPI for control, I²S for audio signal path
- Environment: Consumer-grade enclosure, ambient temp 0–40 °C, continuous playback for 8+ hours
- Design goal: Balanced power and audio performance
Why this works: Each block has a role, the interfaces are clear, and design priorities are actionable. This helps Flux recommend components and validate architecture.
Tip: Stay at the system level. Don’t worry about exact pin counts or part numbers yet.
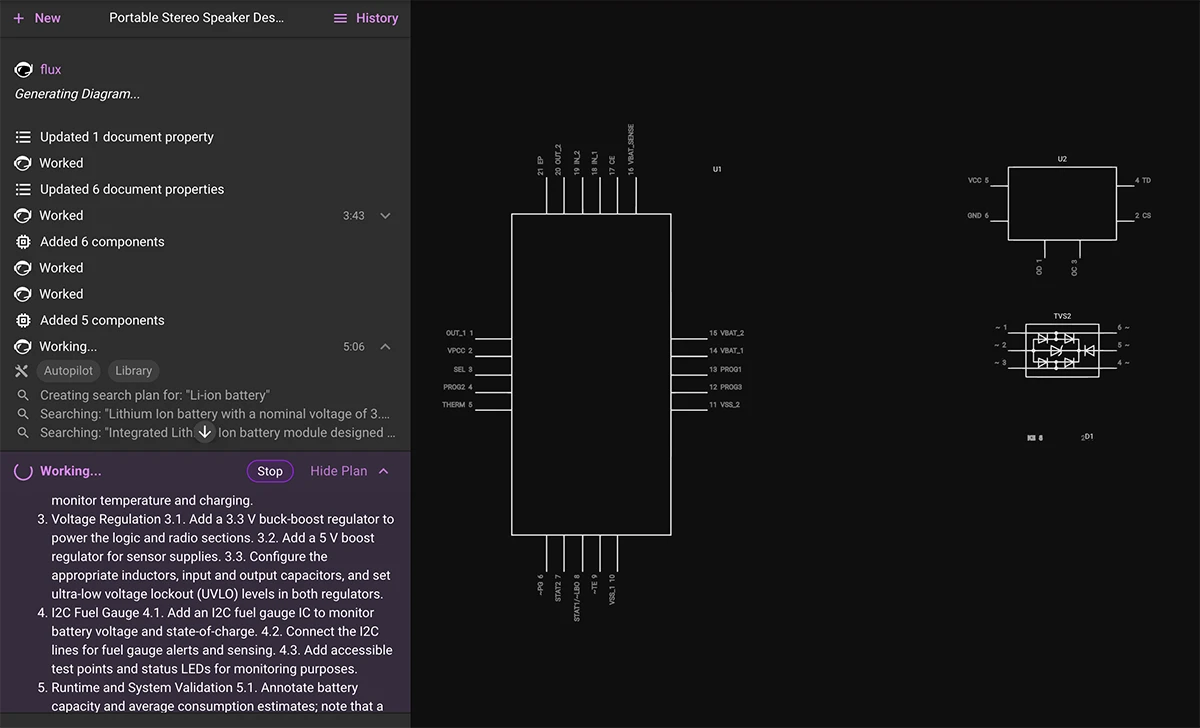
With the architecture in place, pick one block and go deep. This is where you can ask Flux to draft a schematic or layout based on specific inputs and constraints.
Flux typically works best when you break up schematic generation step by step picking one block at a time and going deep. This is where you can ask Flux to draft a schematic or layout based on specific inputs and constraints.
Flux can research components, place them into the schematic, and wire up the nets for you. Although sometimes the resulting layout might look different than you’d expect, you can always jump in and organize things however you like.
Use this formula:
We’re designing the [block name] for this project.
Inputs:
- [Power inputs and characteristics]
- [Signal inputs, interfaces, or control lines]
Requirements:
- [Functional goals—e.g., voltage regulation, signal processing]
- [Performance targets—e.g., power budget, timing, noise]
- [Constraints—e.g., size, cost, runtime, safety]
Protection:
- [What to protect against—e.g., ESD, reverse polarity, EMI]
Design goal:
- [Overall priority—e.g., efficiency, safety, manufacturability]
Example:
Let's design the power management block.
Inputs:
- 3.7V Li-ion battery (2000 mAh)
- USB-C input for charging
Requirements:
- Charge controller with input current limit and battery protection
- Boost to 3.3 V for digital logic and 5 V for gas sensors
- 48-hour runtime target at ~50 mA average current
- Battery voltage and charge status monitoring via I²C
Protection:
- ESD on USB-C
- Reverse polarity and over-discharge protection
Design goal: Efficient, compact, and safe for consumer use
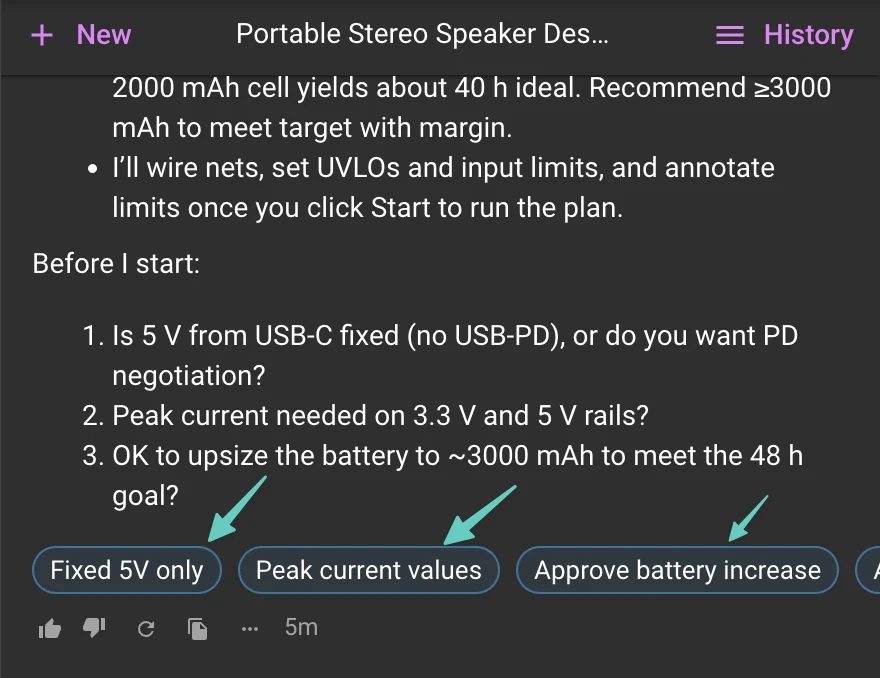
Tip: Link datasheets or PDFs for reference—Flux can match its design to those specs.
Flux AI operates in two complementary modes—one for exploration, one for precision. Use the planning mode when you’re exploring ideas or starting from scratch. It’s great at figuring out workflows and proposing architectures.
Use the single task mode by disabling planning when you need control—editing one block, fixing small issues, or checking results. To disable planning mode, hover over the AI icon at the bottom of the chat menu and click on “disable planning”.
After helping hundreds of users in the Flux Slack community, we’ve noticed some common stumbling blocks when working with the AI. Most of these are easy to fix once you know what to look out for.
Here are a few patterns to avoid:
The earlier you correct course, the faster you get to a working design.
Flux’s AI is improving fast, but there are still a few areas where you may need to step in. We want to be upfront about what’s working well—and what still needs a human touch.
Here’s what to expect:
Known limitations:
Flux is rapidly growing its AI capabilities to support:
Every great board starts with a clear idea. Whether you’re designing your first schematic or refining a production layout, better prompting leads to better results.
Use this guide to help Flux work like the engineering intern you’ve always wanted—fast, reliable, and just a prompt away.
If you haven’t seen what’s changed, read the launch blog for the full story.
This guide shows how to collaborate with Flux at the schematic stage. You’ll learn how to describe your intent clearly, guide the AI through design decisions, and review results so each iteration gets smarter.
Flux isn’t magic — it’s more like a fast, thoughtful engineering intern. With the right direction, it can turn your idea into a manufacturable schematic while you stay in control of the design. Flux also can't generate a full board in one go. Instead, make sure to split the process in steps and use AI to get you to the next stage. Let’s start by learning how to work with Flux to:
This workflow allows you to move fast while keeping control. The sections below walkthrough how to write great prompts.
Start by describing what you're building, why it matters, and who it's for. This gives Flux enough context to generate a reasonable plan that typically includes system-level architecture. After the initial prompt, with planning mode activated, Flux will generate a plan you can approve or modify. Then, click start to watch it work.
The following prompt template works well for kicking projects off because it sets intent (why), scope (what), and constraints (how).
Use this formula:
Make me a {what it is} with {connectivity}, powered by {power} for {application}.
Followed by detailed info:
{detailed what it is} with {detailed connectivity}, powered by {detailed power}.
Example:
Make me a {portable stereo Class-D speaker} with {Wi-Fi and Bluetooth}, powered by {a multi-cell Li-ion/LiPo battery} for {consumer use}.
It should be a compact stereo system with dual Class-D amps (2×10–25 W), basic DSP or MCU tone controls, dual-radio Wi-Fi + BLE (2.4 GHz 802.11 b/g/n plus BLE 5.x), and a Li-ion/LiPo BMS with balancing and pack monitoring.
Tips
The plan that Flux generates typically benefits from more specificity on the systems and subsystems before you approve it. So, be sure to review and make sure everything makes sense before you have Flux start executing the plan. At this stage you can follow Flux’s initial system-level architecture suggestion and let it help you reason through the role of each block, interfaces, and signal flow.
Use this formula for providing more details:
- Power: [voltage rails, current needs]
- Communication: [interfaces between blocks]
- Environment: [thermal, ingress, EMI, etc.]
- Etc.
Design goal: [priorities or trade-offs]
Example:
- Audio block: drives two 10–25 W Class-D amplifiers using a stereo signal path. Includes simple EQ via a low-cost DSP or microcontroller, and volume control from a rotary encoder. Accepts I²S or analog input.
- Connectivity block: dual-radio module (Wi-Fi 802.11 b/g/n and BLE 5.x) for audio streaming and pairing. Includes antenna interface, UART/SPI communication with MCU, and audio over I²S.
- Power block: multi-cell Li-ion/LiPo battery with BMS. Provides 3.3 V rail for logic, 5 V rail for radio, and higher-voltage boost for amplifier rails. Supports charging via USB-C with protection. Battery input with boost converters and LDOs as needed
- Communication: UART/SPI for control, I²S for audio signal path
- Environment: Consumer-grade enclosure, ambient temp 0–40 °C, continuous playback for 8+ hours
- Design goal: Balanced power and audio performance
Why this works: Each block has a role, the interfaces are clear, and design priorities are actionable. This helps Flux recommend components and validate architecture.
Tip: Stay at the system level. Don’t worry about exact pin counts or part numbers yet.
With the architecture in place, pick one block and go deep. This is where you can ask Flux to draft a schematic or layout based on specific inputs and constraints.
Flux typically works best when you break up schematic generation step by step picking one block at a time and going deep. This is where you can ask Flux to draft a schematic or layout based on specific inputs and constraints.
Flux can research components, place them into the schematic, and wire up the nets for you. Although sometimes the resulting layout might look different than you’d expect, you can always jump in and organize things however you like.
Use this formula:
We’re designing the [block name] for this project.
Inputs:
- [Power inputs and characteristics]
- [Signal inputs, interfaces, or control lines]
Requirements:
- [Functional goals—e.g., voltage regulation, signal processing]
- [Performance targets—e.g., power budget, timing, noise]
- [Constraints—e.g., size, cost, runtime, safety]
Protection:
- [What to protect against—e.g., ESD, reverse polarity, EMI]
Design goal:
- [Overall priority—e.g., efficiency, safety, manufacturability]
Example:
Let's design the power management block.
Inputs:
- 3.7V Li-ion battery (2000 mAh)
- USB-C input for charging
Requirements:
- Charge controller with input current limit and battery protection
- Boost to 3.3 V for digital logic and 5 V for gas sensors
- 48-hour runtime target at ~50 mA average current
- Battery voltage and charge status monitoring via I²C
Protection:
- ESD on USB-C
- Reverse polarity and over-discharge protection
Design goal: Efficient, compact, and safe for consumer use
Tip: Link datasheets or PDFs for reference—Flux can match its design to those specs.
Flux AI operates in two complementary modes—one for exploration, one for precision. Use the planning mode when you’re exploring ideas or starting from scratch. It’s great at figuring out workflows and proposing architectures.
Use the single task mode by disabling planning when you need control—editing one block, fixing small issues, or checking results. To disable planning mode, hover over the AI icon at the bottom of the chat menu and click on “disable planning”.
After helping hundreds of users in the Flux Slack community, we’ve noticed some common stumbling blocks when working with the AI. Most of these are easy to fix once you know what to look out for.
Here are a few patterns to avoid:
The earlier you correct course, the faster you get to a working design.
Flux’s AI is improving fast, but there are still a few areas where you may need to step in. We want to be upfront about what’s working well—and what still needs a human touch.
Here’s what to expect:
Known limitations:
Flux is rapidly growing its AI capabilities to support:
Every great board starts with a clear idea. Whether you’re designing your first schematic or refining a production layout, better prompting leads to better results.
Use this guide to help Flux work like the engineering intern you’ve always wanted—fast, reliable, and just a prompt away.


Imagine a future where your most complex PCB design challenges are met with an intelligent AI assistant, capable of handling everything from component selection to compliance checks. Read on to discover how Copilot, embedded within the Flux platform, is turning this vision into a reality, liberating electrical engineers to focus on what truly matters: innovation.

We want to make this process as easy as possible for all Flux users. So, after hundreds of hours of testing and talking to dozens of real users, we’ve put together six prompting tips that will help you get the most out of Copilot. Read on to learn more!

We're excited to reveal a major upgrade - Flux Copilot is transitioning from being a helpful guide to a proactive partner. It no longer just advises but, with your approval, can now wires components together! This is a small step towards fully generative AI, reducing the time and complexity often associated with component connections.

Discover how CAD Librarians can leverage Flux’s key capabilities—AI Part Imports, Component Updates, Live Pricing, and JEP30 Export—each tailored to meet the specific demands of maintaining PCB libraries.

Designing an AI pin would normally take months, but in this project, we did it in hours. In our step-by-step guide, you'll see how Flux can accelerate your design process and bring your AI pin project to life.

Today, we’re excited to introduce AI Auto-Layout, powered by Flux Copilot. This is the next step toward full layout automation. With just one click, Copilot tackles the repetitive task of routing your board, delivering clean, human-like results that are easy to work with and iterate on.

Imagine designing a PCB in a third less time than you're used to - that's the power of Flux Copilot's new upgrade, allowing it to wire components together for you. In this tutorial, we'll walk you through the important workflows and example prompts to help you design a Raspberry-Pi-Pico-like board in 20 minutes.

Copilot new access to Flux’s live pricing and availability tools so that it can do the supply chain and cost analysis for you. Read on to learn about how we’re leveraging AI to give you the power of an entire supply-chain team right at your fingertips.

In this post, we’ll explore why these concepts matter, how they impact signal integrity and power distribution, and what to keep in mind as you design. If you want to go deeper into implementation details—like when to use zones, where to place stitching vias, or how to avoid stack-up pitfalls—we’ve created a detailed PDF guide just for that.

Today, we’re launching automatic photorealistic 3D renderings so that you can put your best foot forward and share your work to the world. Now, anyone can effortlessly create stunning, dynamic, and professional 3D renders.
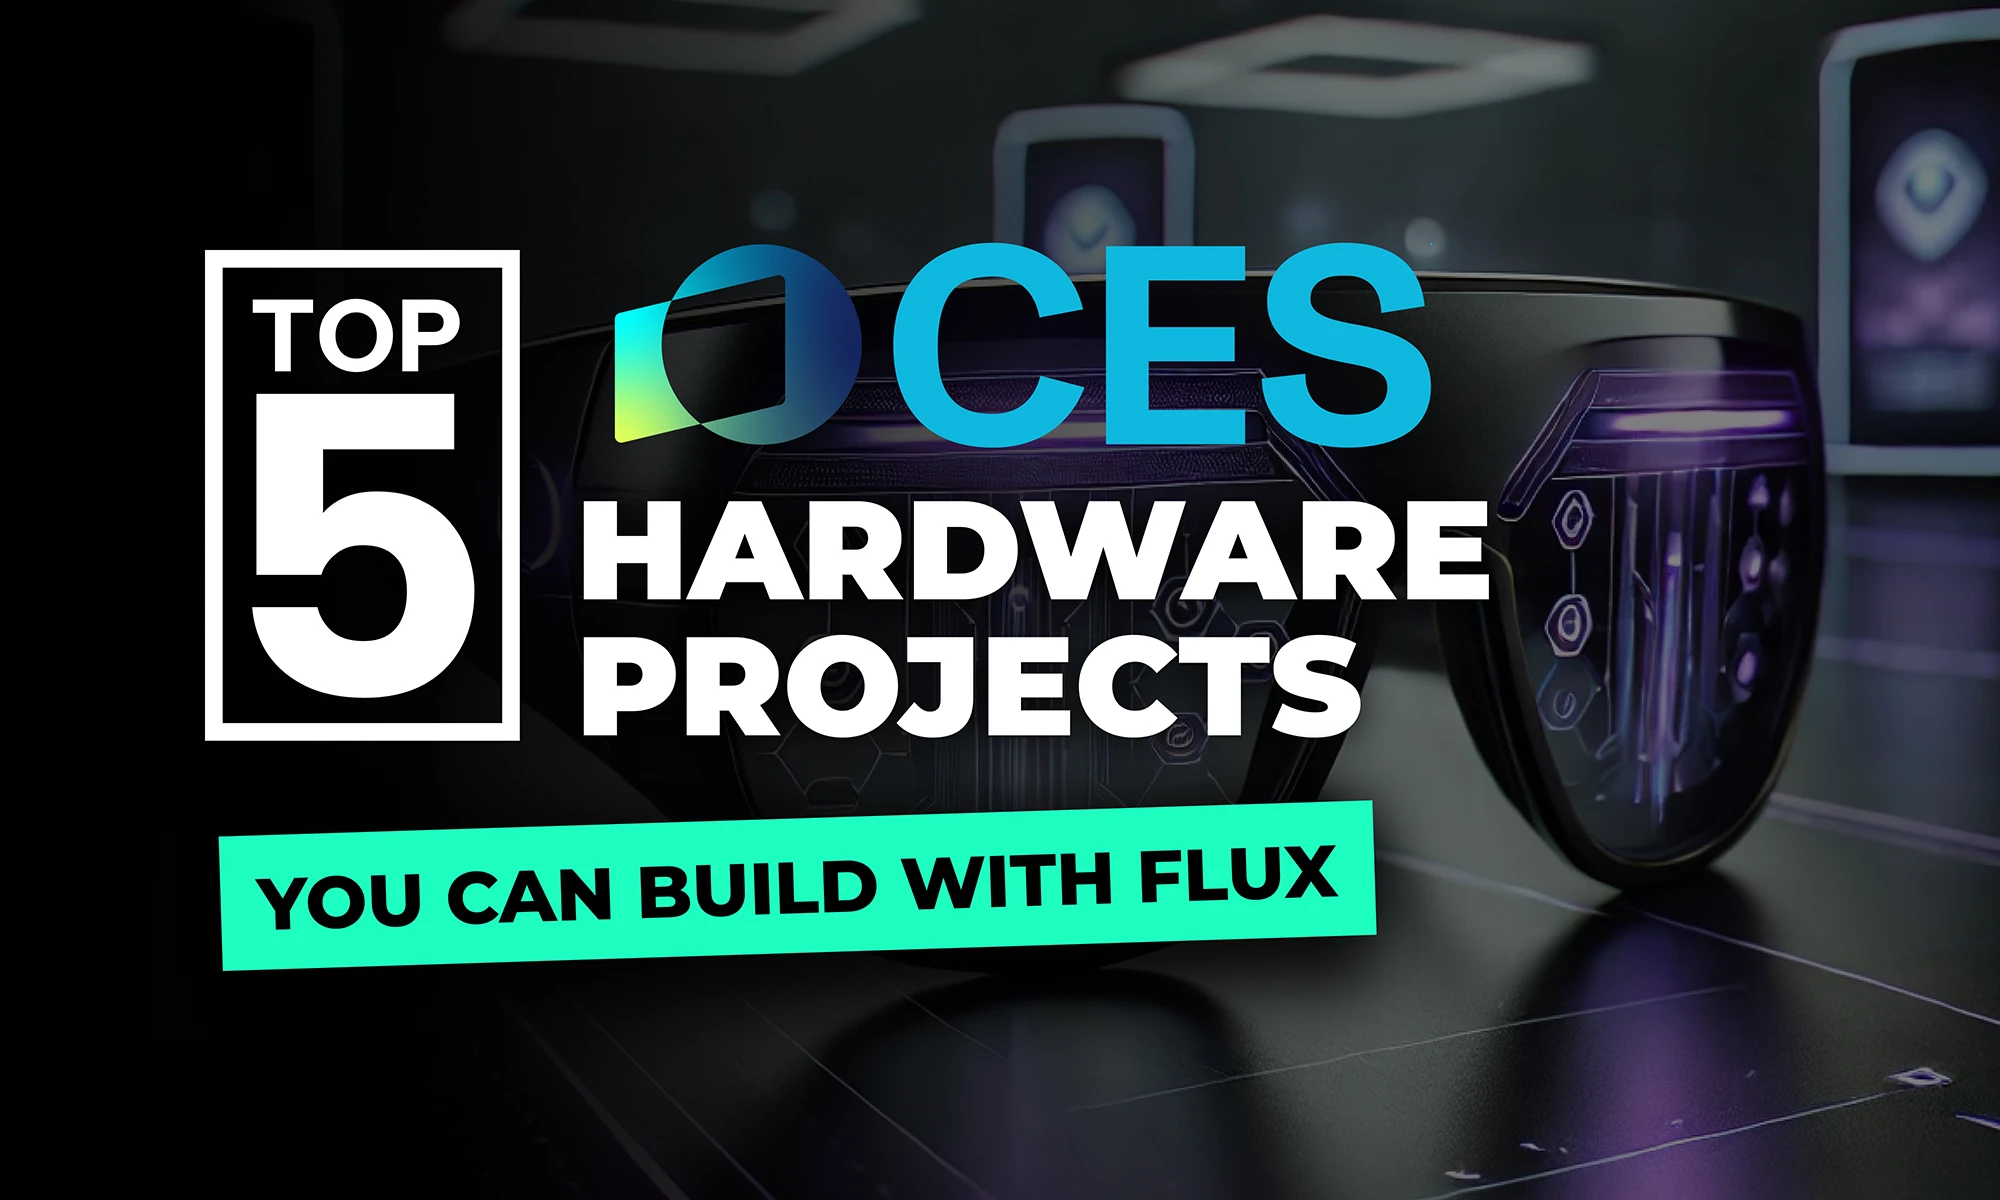
This blog highlights CES 2025 showcased projects, offering insights on how to recreate them using Flux. With Flux AI-driven design tools, component library, and customizable templates, engineers and hobbyists can build inspired hardware like wearables, drones, EV components, portable chargers, and solar devices.
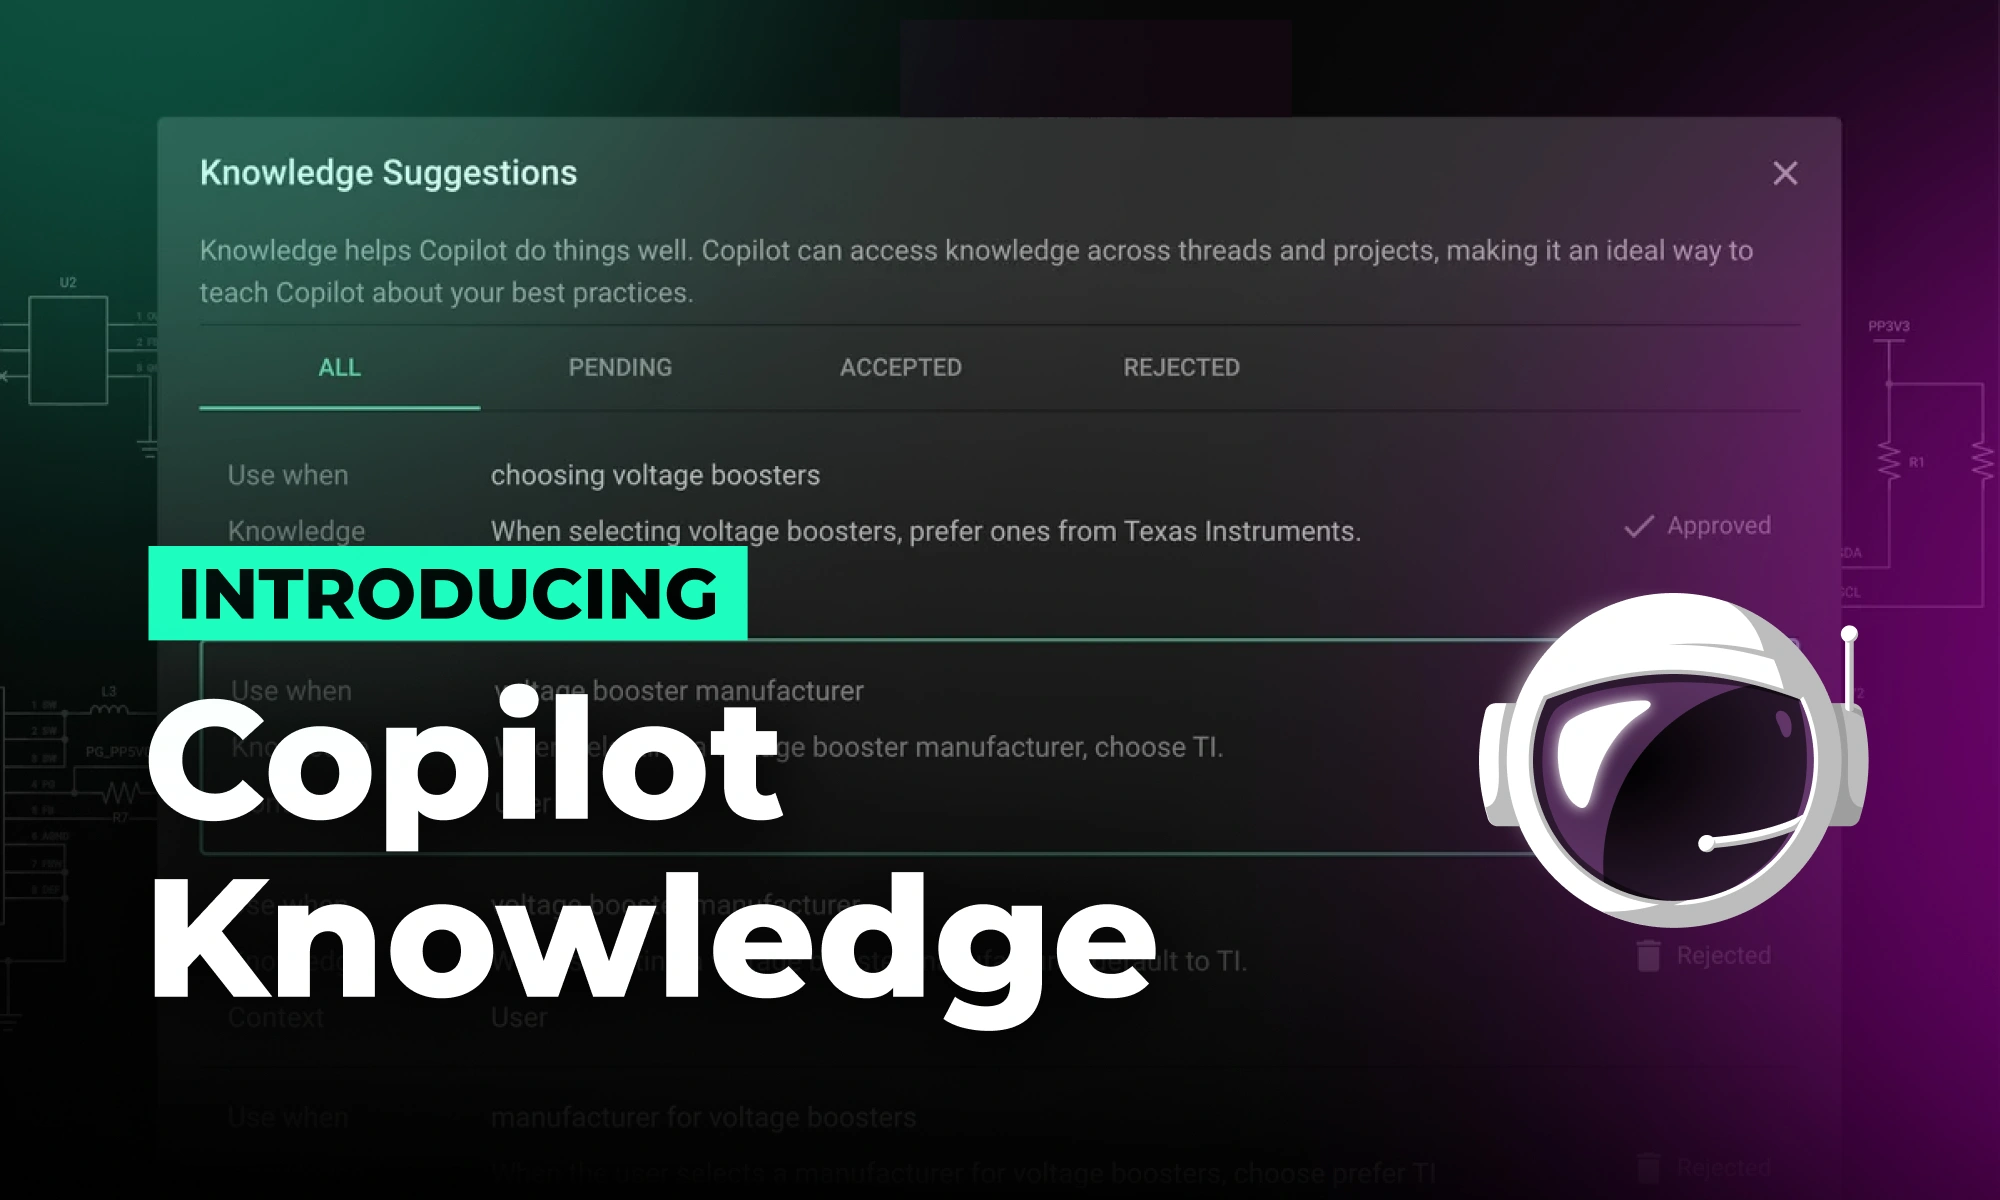
Now, Flux Copilot can learn how you work—your design principles, part selection preferences, schematic style guidelines, and testing workflows—and remember them automatically.