AI Auto Layout’s Winter Update delivers cleaner, more human-like routing with faster, more reliable results. It handles most of the routing workload so you can focus on the critical parts of your PCB design.
Practical guide to writing prompts that get quality results from Flux. We’ll talk about the anatomy of a good prompt and how you can use different LLMs to come up with a great prompt.
Here’s a practical guide to writing prompts that get quality results from Flux. We’ll talk about the anatomy of a good prompt and how you can use different LLMs to come up with a great prompt.
Models behave like fast, literal collaborators. They do best when you hand them the same things you’d give a new teammate: context, constraints, and a definition of “done.” OpenAI, Anthropic, and Microsoft all emphasize the same fundamentals; be specific, provide context and examples, and iterate because models respond measurably better to concrete instructions than vague goals.
For hardware, that specificity translates into;
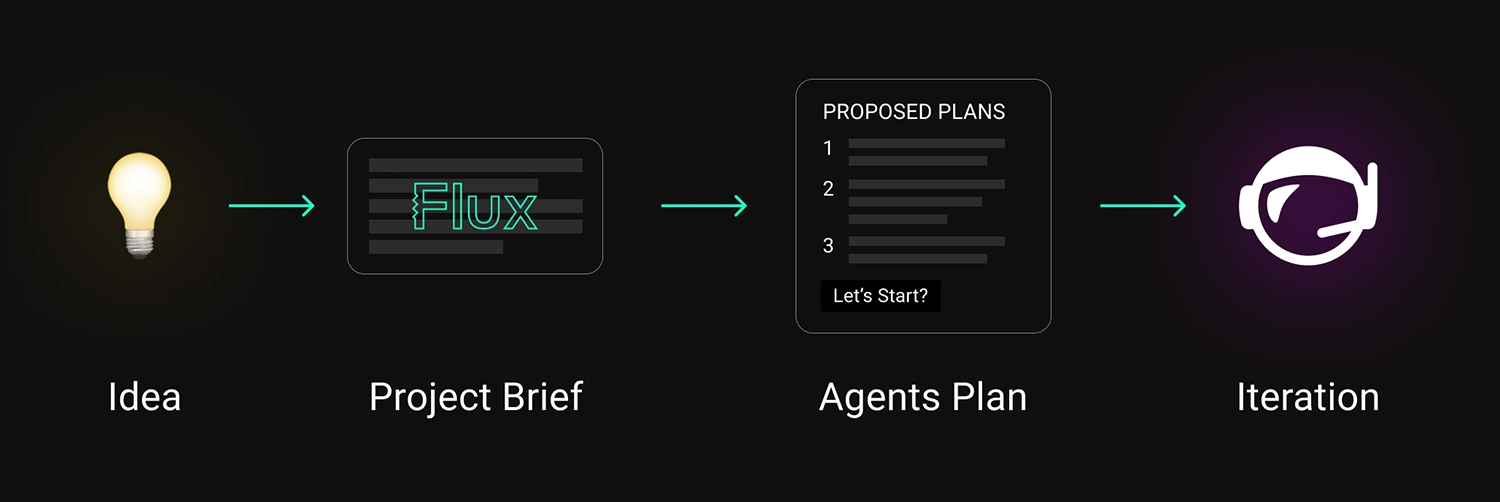
PCB design is now starting the same way, with a sentence that sets direction. The right workflow turns that sentence into a plan, and that plan into a real board.
A strong prompt has structure. You don’t need to overthink it — just fill in the blanks like you would for a teammate’s design request.
Once you’ve written that out, you’ll notice something: it’s the same info you’d include in a solid design doc. You’re just telling it to the AI in natural language.
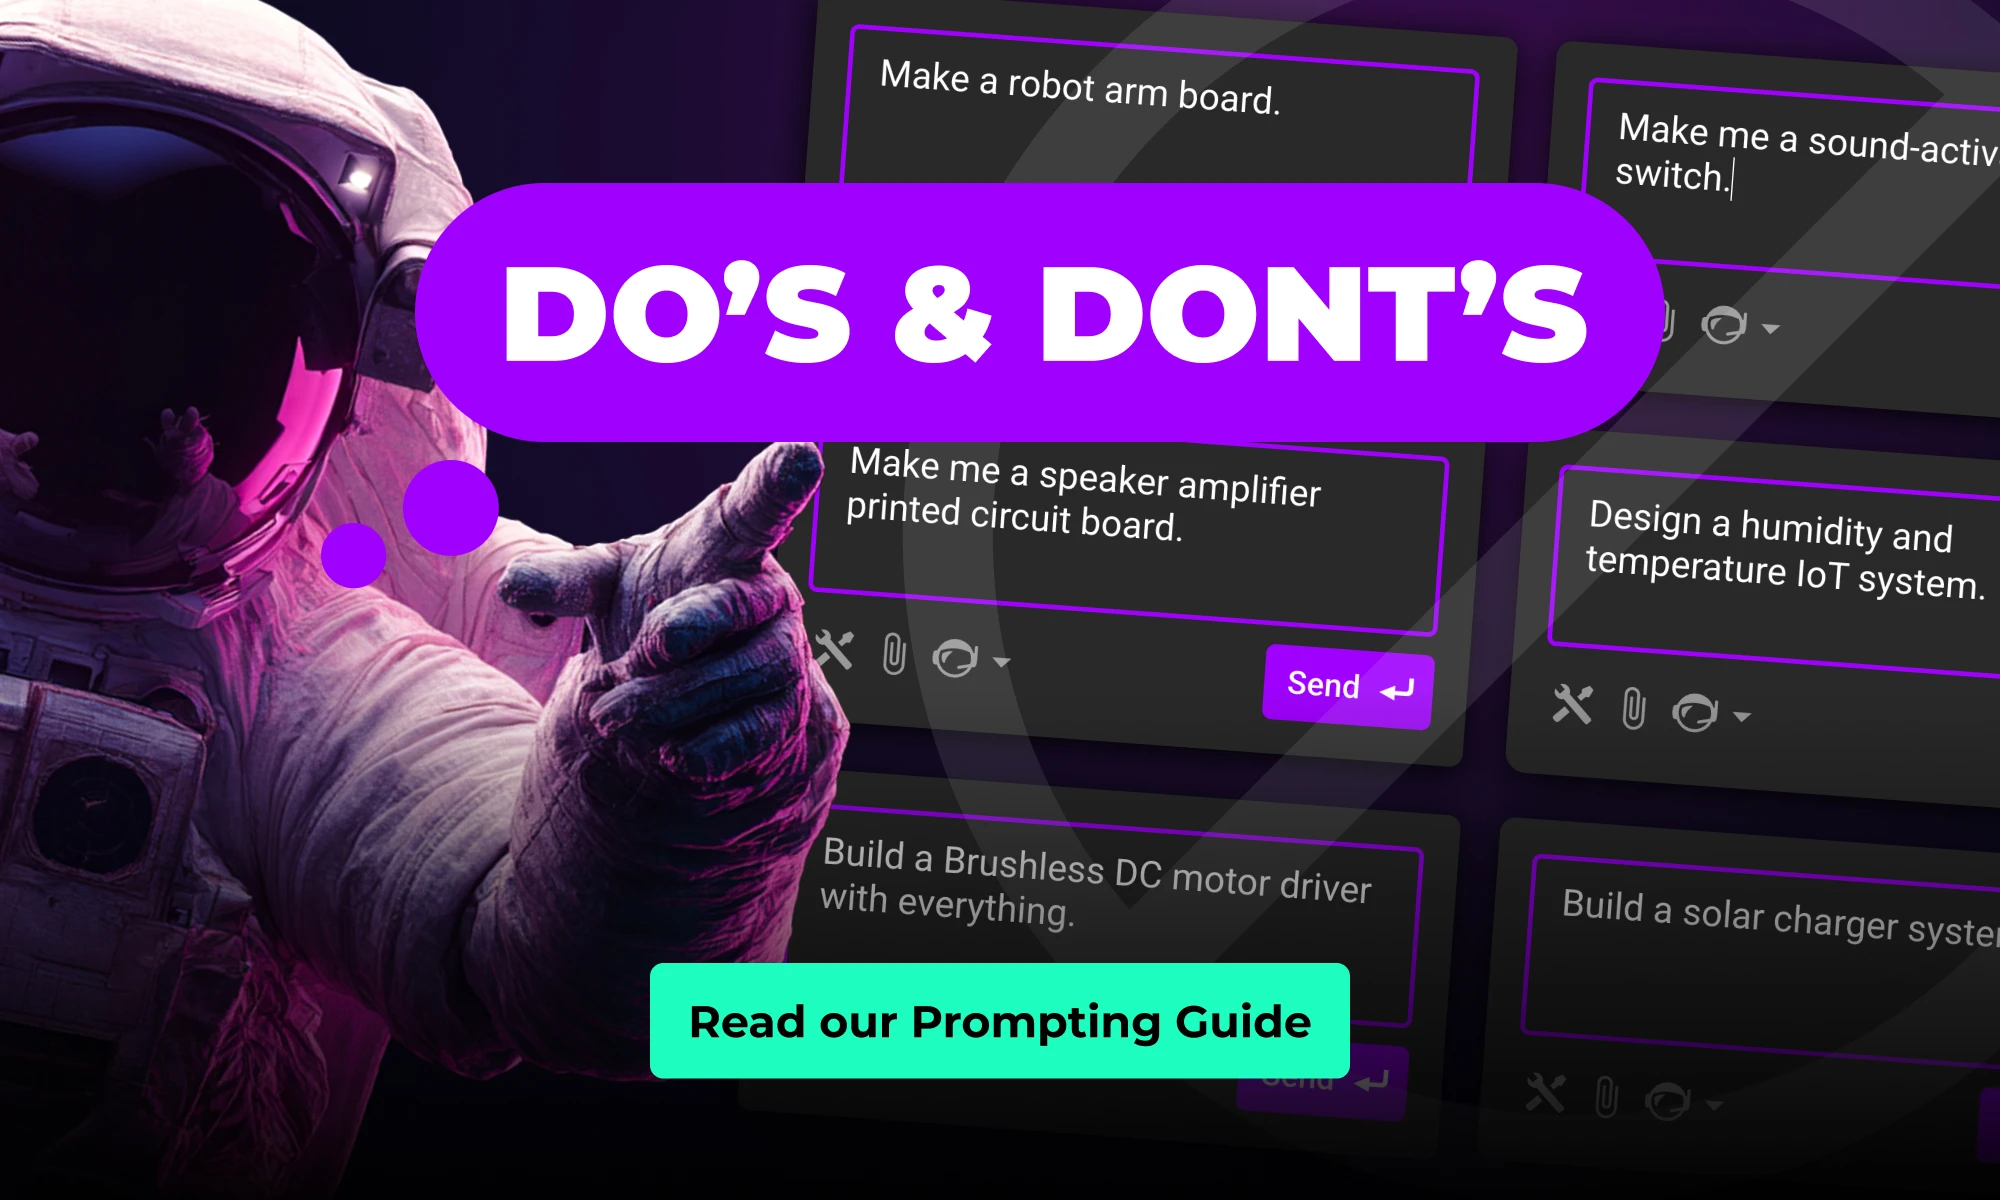
Bad
“Design a PCB to power my sensor node.”
Better
Create a compact, two-layer PCB for a battery-powered environmental sensor that can measure temperature and humidity outdoors year-round.
Functions: Step down Li-ion voltage (3.0–4.2 V) to a stable 3.3 V @ 500 mA to power an MCU and BLE module, while maintaining low noise for accurate sensor readings.
Power model: Single-cell Li-ion input with optional USB-C charging and reverse-current protection; system should support sleep modes with minimal quiescent draw.
Key constraints: Total board area ≤ 2 cm²; must use widely available components from LCSC or Mouser; prioritize efficiency (≥ 85%) and long battery life over BOM cost; all parts hand-solderable and suitable for low-volume prototyping.
Interfaces & I/O: I²C bus for sensors, UART header for debugging, JST-PH connector for the battery, and test points for power rails and signal lines.
Replace the bracketed parts, and keep it as one block.
Below is a single-block prompt example for an enterprise-style project. Use the structure and adapt the content.
OzCorp’s building a robotic arm for its Kitchen Independence line—assistive gear to help folks with limited mobility cook safely. It’ll live near stovetops, inside semi-sealed enclosures, and handle risky, high-precision tasks. We need a v1 board for early testing—tight stack, safe motion, easy to iterate.
Board should be quiet, cleanable, fault-tolerant, and built with safety-first motor control. Design for real-world abuse, not just the bench.
Requirements:
* Thermal: Run clean near 70°C, layout ready for passive shielding.
* Ingress: Tolerate steam/oil, avoid exposed headers, semi-wipeable.
* EMI: Survive near induction tops; solid filtering and layout.
* Motors: Drive 4–6 steppers or BLDCs w/ encoders, quiet + smooth.
* IO: Temp + proximity sensors; USB-C or UART; room for add-ons.
Primary input will be a 24 V DC external supply—off-the-shelf medical-grade adapter. Budget ~5 A peak, ~2 A continuous for everything. Motors are 24 V BLDCs with integrated drivers, so we don’t need separate gate drive rails.
Rails we’ll need:
* 24 V passthrough for motors
* 5 V rail for sensors, logic level translators, and E-stop handling
* 3.3 V clean rail for MCU and digital IO
* 2.8 V, 1.8 V and 2.3 V analog-only rails for the camera
* No additional rails, however, keep layout flexibility in mind in case we add additional sensing later.
No galvanic isolation needed between motor and logic domains in this rev—common ground is fine as long as noise coupling is controlled. Just prioritize good filtering and separation in the layout.
We’re targeting a higher-end embedded MCU—something with enough headroom for real-time motor control, sensor fusion, and field updates without jumping to a full MPU. Needs to support external memory and camera input via MIPI CSI (basic CV down the line), and ideally has built-in Ethernet MAC with PoE support for hardwired installs.
We’re also dropping in a discrete Zigbee radio—most of the Kitchen Independence line will communicate over a shared Zigbee mesh for interoperability and OTA updates, so we’ll need clean SPI or UART for that interface, plus a decent RF layout budget. USB device is a must, USB host is a nice-to-have. No Linux this rev—we’re keeping it lean and RTOS-friendly.
This approach resembles a planning meeting rather than a netlist, allowing for a more comprehensive and strategic overview. By defining environment and safety considerations early, it significantly influences and shapes the overall architecture. Additionally, it outlines the rails and interfaces without prematurely committing to specific chips, providing greater flexibility. This method also leaves room for the agent to propose blocks and components that align with and satisfy the project's goals.
Once your requirements are clear, bring them to life. Paste your brief into a new project in Flux, and watch as your AI assistant turns that structured intent into a concrete starting point.
Flux’s AI agent doesn’t replace that balance; it amplifies it. When you give it clarity, it gives you momentum. When you ask better questions, it becomes a sharper collaborator.
Plan like a product team, define clearly, and let the AI handle the first draft of your design.
The future of hardware starts here, open Flux and start your next project today.
Are you creating the right hardware solution for the problem that truly matters? Learn how to validate ideas, prototype fast, and use modern tools to turn concepts into successful products.
But the world has changed. The cost to experiment has collapsed. AI is leaving the cloud to run on devices the size of a thumbnail. Sensors that once cost hundreds now sell for pennies. For the first time, small teams can move with the creative velocity that software startups have enjoyed for decades. The gap between idea and reality has never been smaller.
And yet, most hardware startups still fail. Only about twenty percent of hardware projects on Kickstarter reach their funding goal, and many of those never ship. Among venture-backed companies, few make it past their first product.
They fail because they mistake building for learning. They fall in love with the object instead of the problem it solves. In software, you can fix mistakes overnight. In hardware, your mistakes ship with the product - literally.
So how do you tell a promising idea from a doomed one? You can’t predict success, but you can evaluate your idea through a few simple, revealing lenses.
Most failed startups didn’t build the wrong product. They built the right product for a problem nobody cared about.
The first filter is pain. Would your users notice if your product disappeared tomorrow? Would they try to hack together a replacement because it mattered that much? A “nice to have” idea might work in software, but in hardware, where every prototype costs time and money, it’s a fatal flaw.
Look for problems that are deeply felt, not just acknowledged. If you can’t name the specific moment your user feels that pain, you haven't dug deep enough.
A brilliant idea is useless if you can’t get it into people’s hands.
Ask yourself: how quickly can I put a prototype in front of ten real users? If the answer involves resellers, trade shows, or corporate pilots, your learning loop is already too slow.
The best founders start where their users already are. They spend time in the workshop, the clinic, the lab, or the kitchen. They observe people in their natural context and test ideas directly. That’s where clarity comes from. If you can’t easily access your early adopters, you’ll waste months designing in the dark.
A beautiful prototype can still make a terrible business.
Before you commit, stress-test the economics. Can you build it at a margin that leaves room to scale? Is there a recurring element, consumables, data, upgrades, or community, that compounds value over time?
If your business model relies entirely on one-time sales, you will be running uphill forever. Hardware margins are thin, so your value has to run deep. The goal isn’t just to make an object; it’s to build a system that sustains itself and the people behind it.
The best ideas rarely come from brainstorming. They come from lived experience.
Tony Fadell didn’t build Nest because he wanted to make thermostats cool. He built it because he was frustrated by how wasteful and outdated they were. Frank Wang started DJI after crashing his own helicopter and realizing flight should be simple. Nirav Patel created Framework because he hated throwing away laptops that should have been repairable.
The common thread is proximity. These founders were close to the problem. They understood it deeply enough to recognize what “better” looked like.
If you’re forcing an idea, it’s probably not the right one. The ideas worth building are the ones that won’t leave you alone.
Once you have clarity on these questions, it’s time to learn through prototypes. Each build should have a clear learning goal. You are not building to finish; you are building to learn.
The point is intentionality. Know what you are trying to learn from each version before you start building. Every successful hardware company runs on validated learning.
Every prototype closes a gap between what you think is true and what actually works in the real world.
For example, you could start prototyping a product idea right now. Try it for yourself:
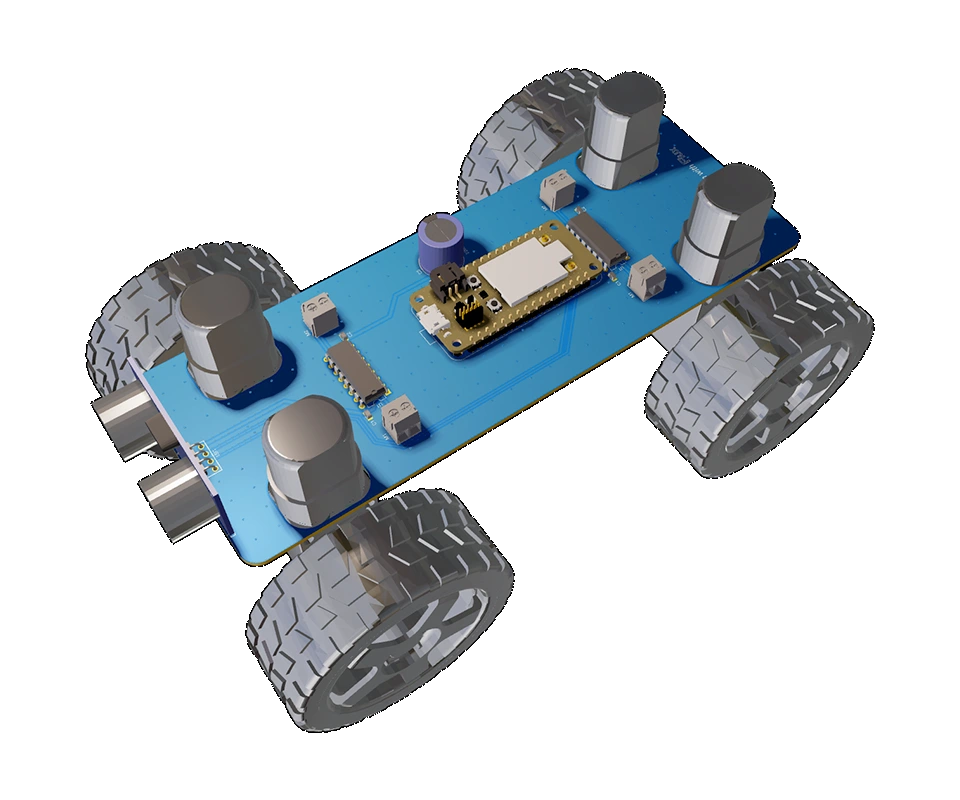
Create a solar-powered IoT environmental sensor node. The goal is to design a compact and energy-efficient PCB for outdoor environmental monitoring applications.
The device should be powered by a small solar panel with a built-in Li-ion battery charging and protection circuit. It will include sensors for temperature, humidity, air quality (CO₂ or VOC), and light intensity. The design should use a low-power microcontroller such as an ESP32, STM32L0, or nRF52, and communicate via LoRaWAN or Wi-Fi. The circuit should incorporate proper power management, voltage regulation, and an ultra-low sleep current design, with a USB-C port for debugging and charging.
Generate a complete schematic with labeled subsystems, including power, sensors, microcontroller, and communication sections. Produce a compact PCB layout optimized for solar and battery integration, along with a suggested component list that includes part numbers. Provide design notes for a waterproof enclosure and antenna placement, and include a manufacturability and testing checklist to ensure production readiness.
{{hardware-founder-prompt-idea}}
Speed used to be hardware’s enemy. Now, it's the ultimate advantage.
Teams that can run five iterations in a few months will outlearn those that spend a year polishing a single version. The best companies make iteration a habit, not a milestone. Whoop tested its early wearables on professional athletes who cared more about results than polish. Oura shipped multiple versions before getting the form factor right.
Iteration speed compounds. Each cycle teaches you more about your market, your users, and your path to scale.
Speed is also a lifesaver in a crisis. Like when Agri-iO’s key component was discontinued, they used Flux to design a custom solution in just a few days. Instead of facing months of delays, they had a working prototype in under a week, allowing them to fulfill a major contract and secure their supply chain. Read the full article.

“I used Flux to ask questions about which pins to connect and to get examples for specific designs. It suggested components and configurations. Flux reduced the amount of review work needed, and overall, it was a wonderful experience.” – Michael van Niekerk, Co-Founder and Head of Technology, Agri-iO
{{underline}}
Every great hardware company eventually realizes it is not just building a device. It’s building a system, the user, the problem, the workflow, and the feedback loop that connects them.
When evaluating your idea, it’s crucial to consider more than just the feasibility of building it. Instead, think about these key questions:
Hardware will always require patience, but the leverage has changed. Intelligence is spreading into the physical world, with the tools to design and test now open to everyone. The cost of curiosity has never been lower.
If you have an idea that keeps you up at night, now is the time to build it.
A decade ago, hardware design was fragmented and slow. Now, the ecosystem is built for speed.
Tools like Flux let teams design circuits in the browser, simulate instantly, and collaborate in real time. You can go from concept to a tested board in days. Prototyping services deliver parts overnight. The bottleneck is no longer the tooling; it’s how clearly you define what to test next.
The frontier isn’t in the cloud anymore. It’s in your hands. For anyone with an idea that keeps them up at night, the tools are finally ready for you.
Don't just build faster, learn faster. Start bringing your idea to life at flux.ai
{{start-designing-with-flux-ai}}
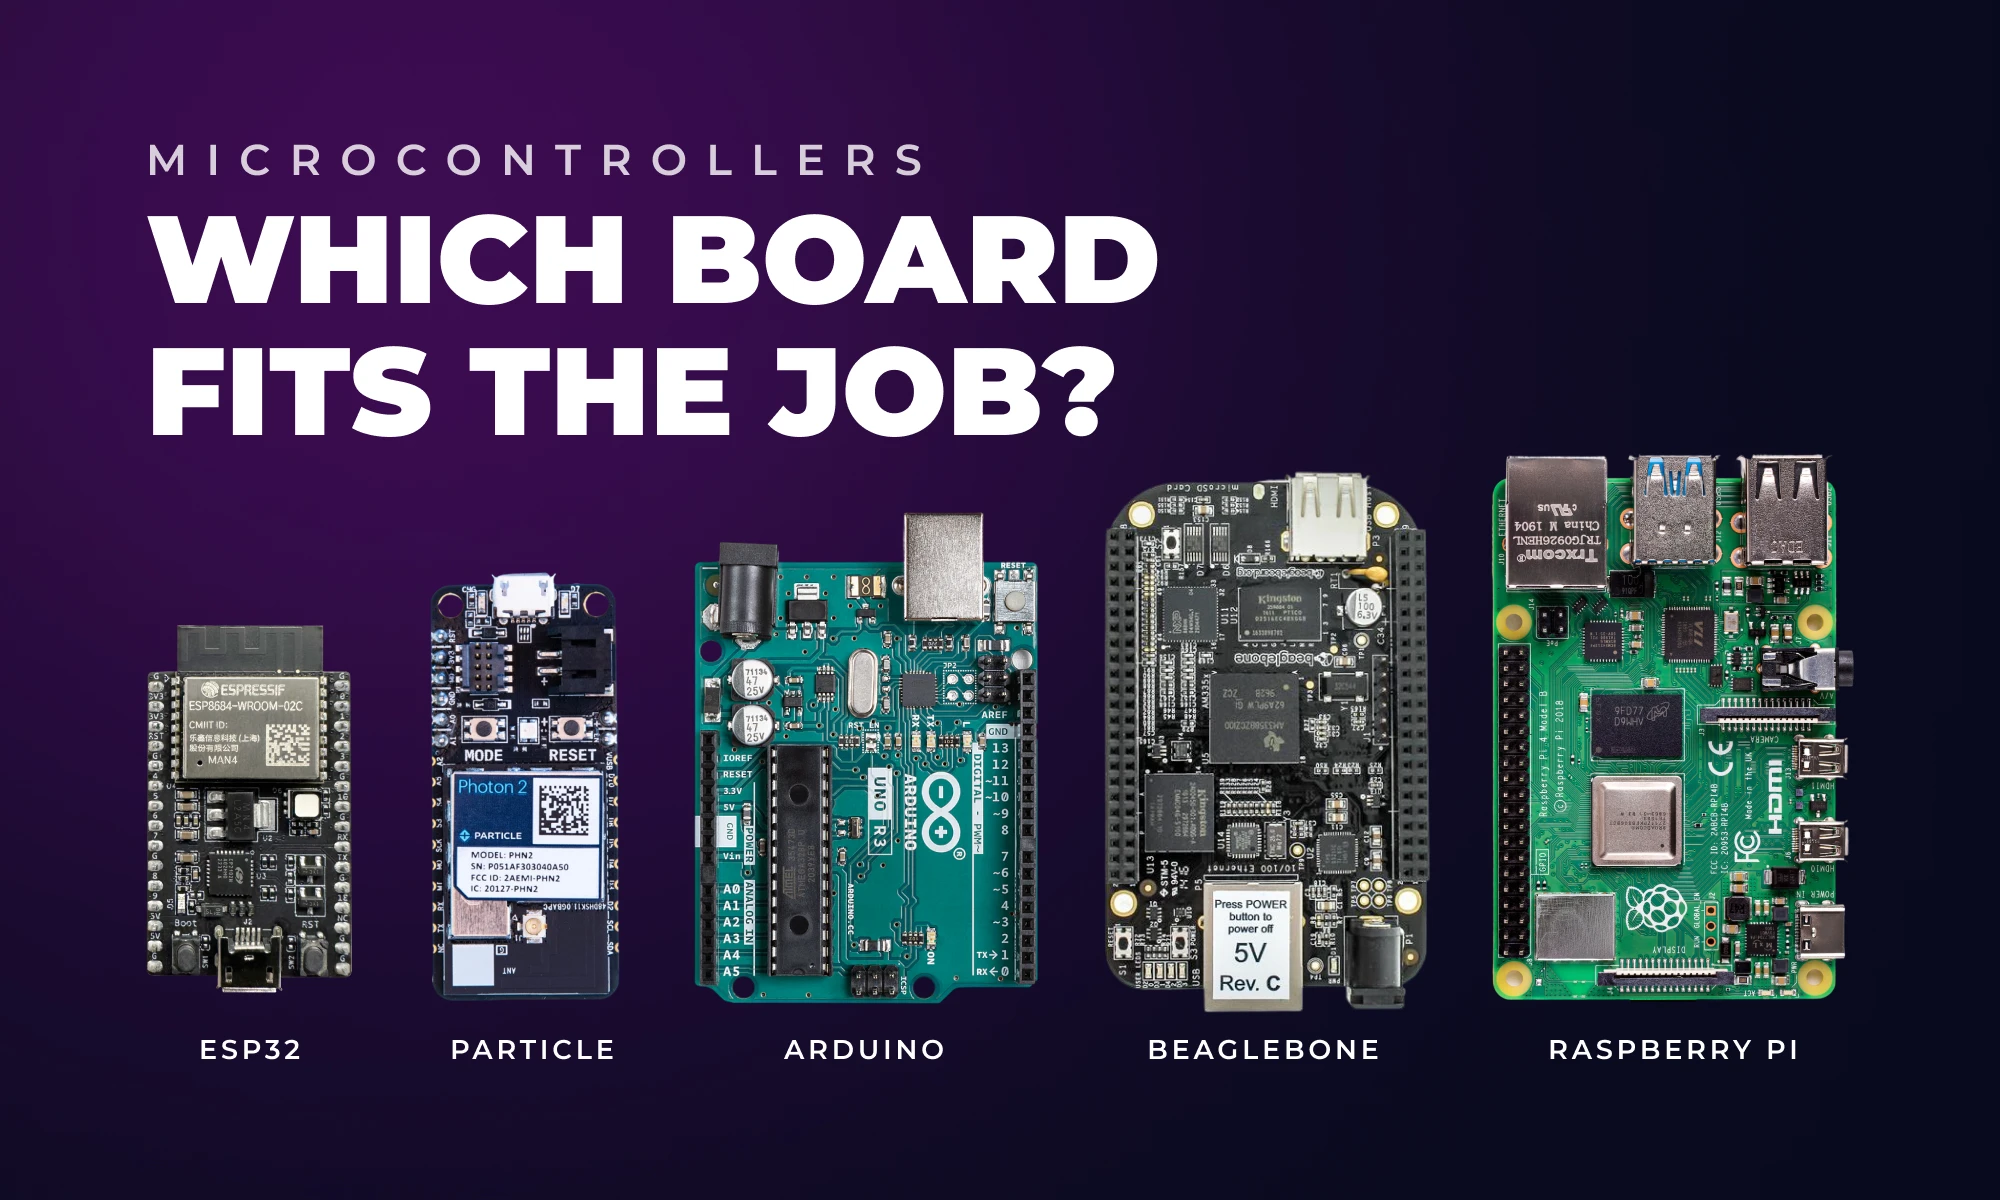
This guide helps you choose the best hardware platform—Arduino, Raspberry Pi, ESP32, or others, by comparing power, connectivity, and scalability for your project.
In this post, we’ll break down the most well-known platforms and how to decide which fits your project best.
Key considerations before choosing a board:
If you’re not sure which board to choose, Flux’s AI can help. It understands these platforms and trade‑offs. Describe your project in plain language and it will ask clarifying questions, compare options, and even suggest components and reference designs based on your needs.Flux’s AI can:
Try asking Flux’s AI:
“I want to build a battery‑powered temperature logger that sends data over WiFi. Which board should I use?”
Try it now
“Compare ESP32 and Raspberry Pi Pico for a low‑power wearable that needs Bluetooth.”
Try it now
“Help me design a prototype around Arduino Nano that could scale to a custom PCB later.”
Try it now
“Which microcontroller would be best for a small robot that needs real‑time motor control and wireless communication?”
Try it now
The AI will walk you through the decision, suggest parts and generate a starting design file you can modify.
{{start-designing-with-flux-ai}}
{{underline}}
Arduino is a microcontroller-based platform known for its simplicity and approachability. Boards like the Arduino Uno are ideal for real-time tasks such as reading sensors or controlling LEDs. You write code in C/C++ using the Arduino IDE, and it runs directly on the hardware without the need of an operating system.
Pros
Cons
Best for
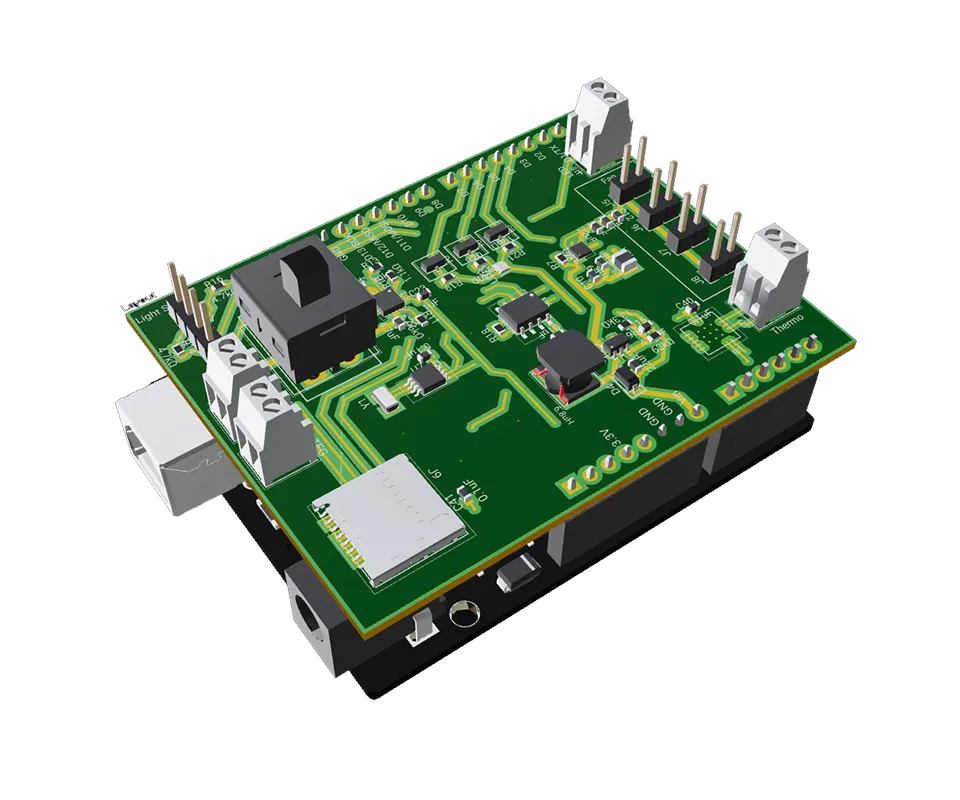
One example project is SmokeSensor Shield which used to monitor chimney smoke and provide feedback to stove.
The Raspberry Pi is a full Linux computer in a small form factor. It can run Python, connect to a monitor, and handle USB peripherals, ideal for complex prototypes, especially when you need a GUI, internet access, or heavier processing like image or audio.
Pros
Cons
Best for
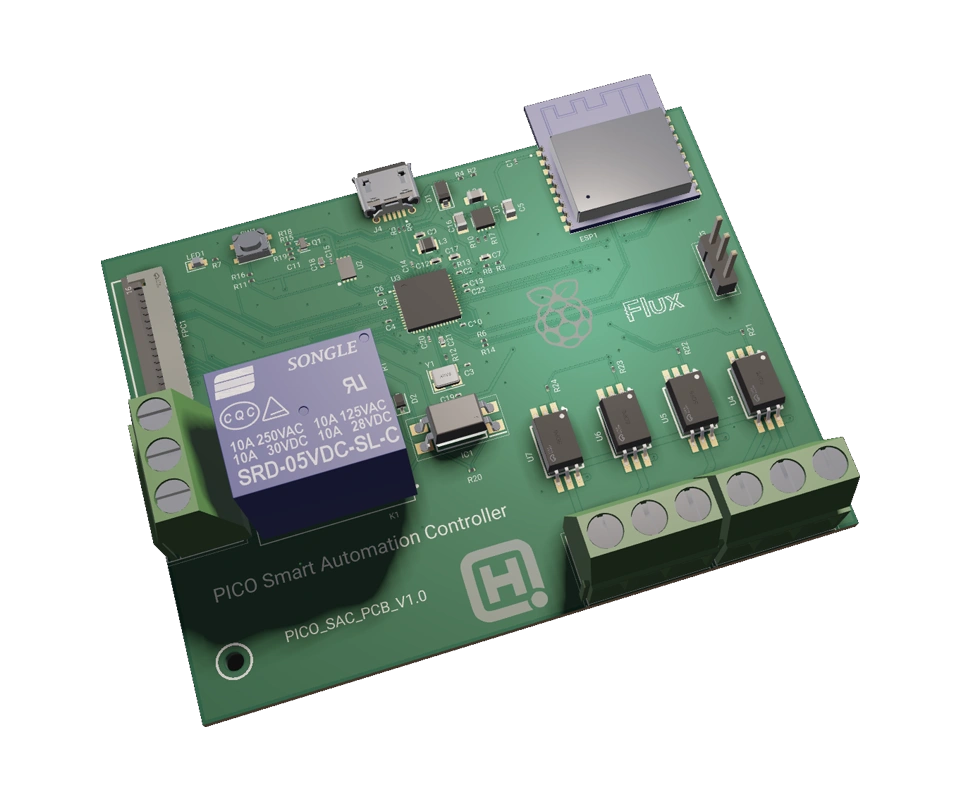
Raspberry Pi has many use cases, including this Pico Smart Automation Controller project which enables intelligent control for sensors, relays, and devices.
The ESP32 strikes a balance: it’s a 32-bit dual-core microcontroller with built-in Wi-Fi and Bluetooth. It has much more power than Arduino but doesn’t run an OS like the Pi. It’s great for IoT applications where you want connectivity, battery efficiency, and scalability.
Pros
Cons
Best for
The ESP32 is one of the more widely known microcontroller, so that means you can find from the simplest to more advanced projects and templates, like these Dual Ultrasonic Water Level Monitoring System and ESP32 Robot Controller project.

Particle combines hardware and cloud into one platform. You get microcontroller boards with built-in connectivity (Wi-Fi, LTE, etc.), plus tools for remote management, firmware updates, and data collection, all managed via Particle Cloud.
Pros
Cons
Best for
Particle has their own great specific use cases, and this Robo project gives you a great idea where to start.
BeagleBone boards are Linux-capable computers like Raspberry Pi but with a focus on industrial use and I/O. Boards like the BeagleBone Black have built-in PRUs (real-time units) and tons of GPIO—perfect for robotics, automation, or anything requiring lots of sensors.
Pros
Cons
Best for
Beyond the “big names” above, here are several other hardware platforms and ecosystems that a small hardware startup might consider, each with niche strengths:
{{underline}}
Ultimately, there’s no one‑size‑fits‑all answer. The “best” platform depends on your project’s unique requirements and constraints. As a small hardware startup founder, you want to maximise development speed and flexibility while ensuring a viable path to scale. Here are some guideline decision‑paths:
Ready to pick a platform and start building? Open Flux, create a new project and ask the AI to help you choose a board. From there you can explore component options, generate schematics and iterate quickly — all without leaving your browser.
{{start-designing-with-flux-ai}}
This guide shows how to collaborate with Flux at the schematic stage. You’ll learn how to describe your intent clearly, guide the AI through design decisions, and review results so each iteration gets smarter.
If you haven’t seen what’s changed, read the launch blog for the full story.
This guide shows how to collaborate with Flux at the schematic stage. You’ll learn how to describe your intent clearly, guide the AI through design decisions, and review results so each iteration gets smarter.
Flux isn’t magic — it’s more like a fast, thoughtful engineering intern. With the right direction, it can turn your idea into a manufacturable schematic while you stay in control of the design. Flux also can't generate a full board in one go. Instead, make sure to split the process in steps and use AI to get you to the next stage. Let’s start by learning how to work with Flux to:
This workflow allows you to move fast while keeping control. The sections below walkthrough how to write great prompts.
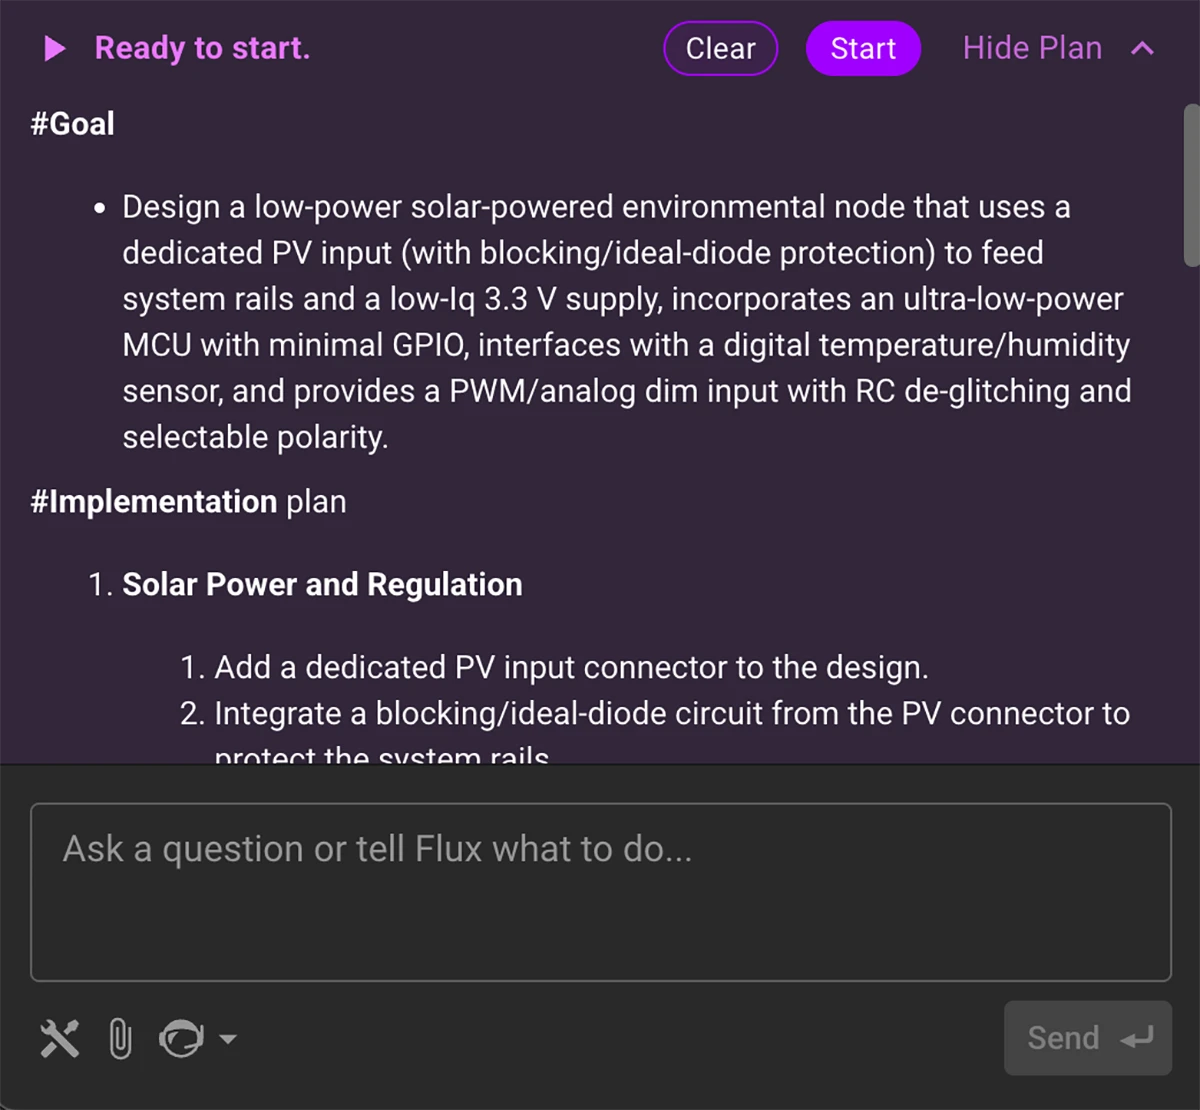
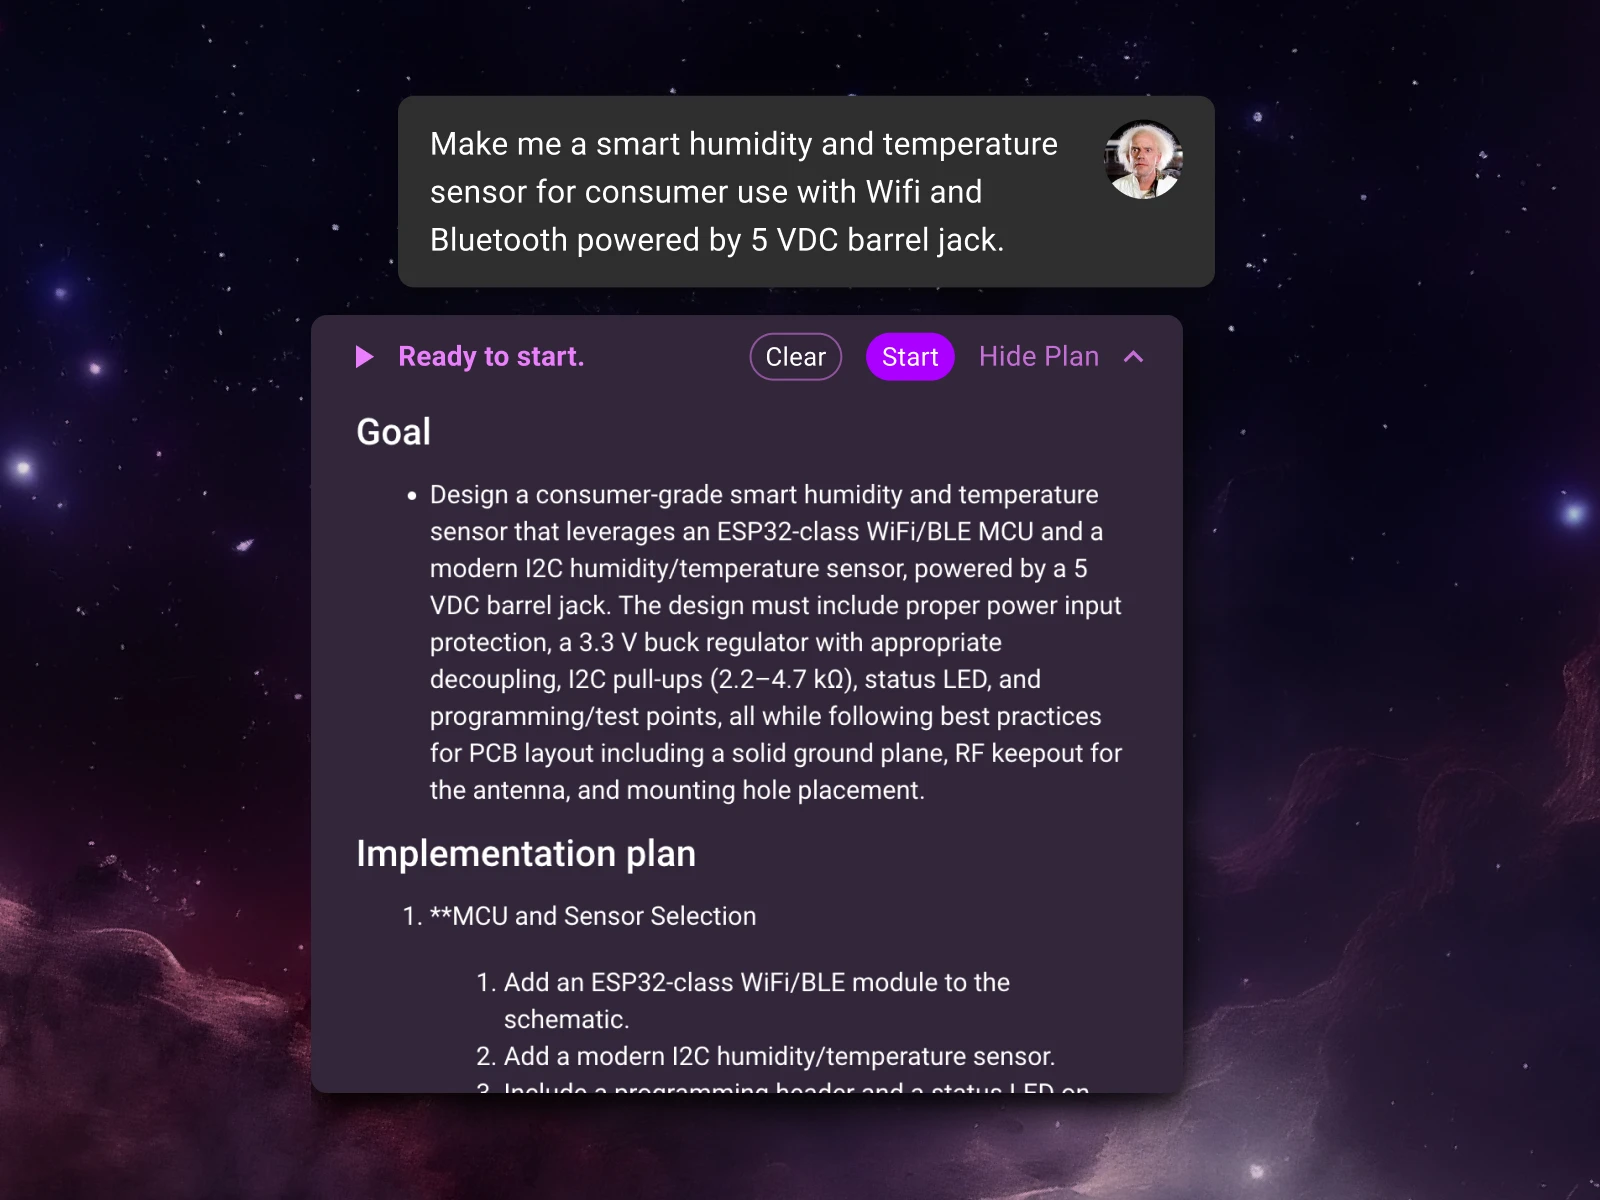
Start by describing what you're building, why it matters, and who it's for. This gives Flux enough context to generate a reasonable plan that typically includes system-level architecture. After the initial prompt, with planning mode activated, Flux will generate a plan you can approve or modify. Then, click start to watch it work.
The following prompt template works well for kicking projects off because it sets intent (why), scope (what), and constraints (how).
Use this formula:
Make me a {what it is} with {connectivity}, powered by {power} for {application}.
Followed by detailed info:
{detailed what it is} with {detailed connectivity}, powered by {detailed power}.
Example:
Make me a {portable stereo Class-D speaker} with {Wi-Fi and Bluetooth}, powered by {a multi-cell Li-ion/LiPo battery} for {consumer use}.
It should be a compact stereo system with dual Class-D amps (2×10–25 W), basic DSP or MCU tone controls, dual-radio Wi-Fi + BLE (2.4 GHz 802.11 b/g/n plus BLE 5.x), and a Li-ion/LiPo BMS with balancing and pack monitoring.
Tips
The plan that Flux generates typically benefits from more specificity on the systems and subsystems before you approve it. So, be sure to review and make sure everything makes sense before you have Flux start executing the plan. At this stage you can follow Flux’s initial system-level architecture suggestion and let it help you reason through the role of each block, interfaces, and signal flow.
Use this formula for providing more details:
- Power: [voltage rails, current needs]
- Communication: [interfaces between blocks]
- Environment: [thermal, ingress, EMI, etc.]
- Etc.
Design goal: [priorities or trade-offs]
Example:
- Audio block: drives two 10–25 W Class-D amplifiers using a stereo signal path. Includes simple EQ via a low-cost DSP or microcontroller, and volume control from a rotary encoder. Accepts I²S or analog input.
- Connectivity block: dual-radio module (Wi-Fi 802.11 b/g/n and BLE 5.x) for audio streaming and pairing. Includes antenna interface, UART/SPI communication with MCU, and audio over I²S.
- Power block: multi-cell Li-ion/LiPo battery with BMS. Provides 3.3 V rail for logic, 5 V rail for radio, and higher-voltage boost for amplifier rails. Supports charging via USB-C with protection. Battery input with boost converters and LDOs as needed
- Communication: UART/SPI for control, I²S for audio signal path
- Environment: Consumer-grade enclosure, ambient temp 0–40 °C, continuous playback for 8+ hours
- Design goal: Balanced power and audio performance
Why this works: Each block has a role, the interfaces are clear, and design priorities are actionable. This helps Flux recommend components and validate architecture.
Tip: Stay at the system level. Don’t worry about exact pin counts or part numbers yet.
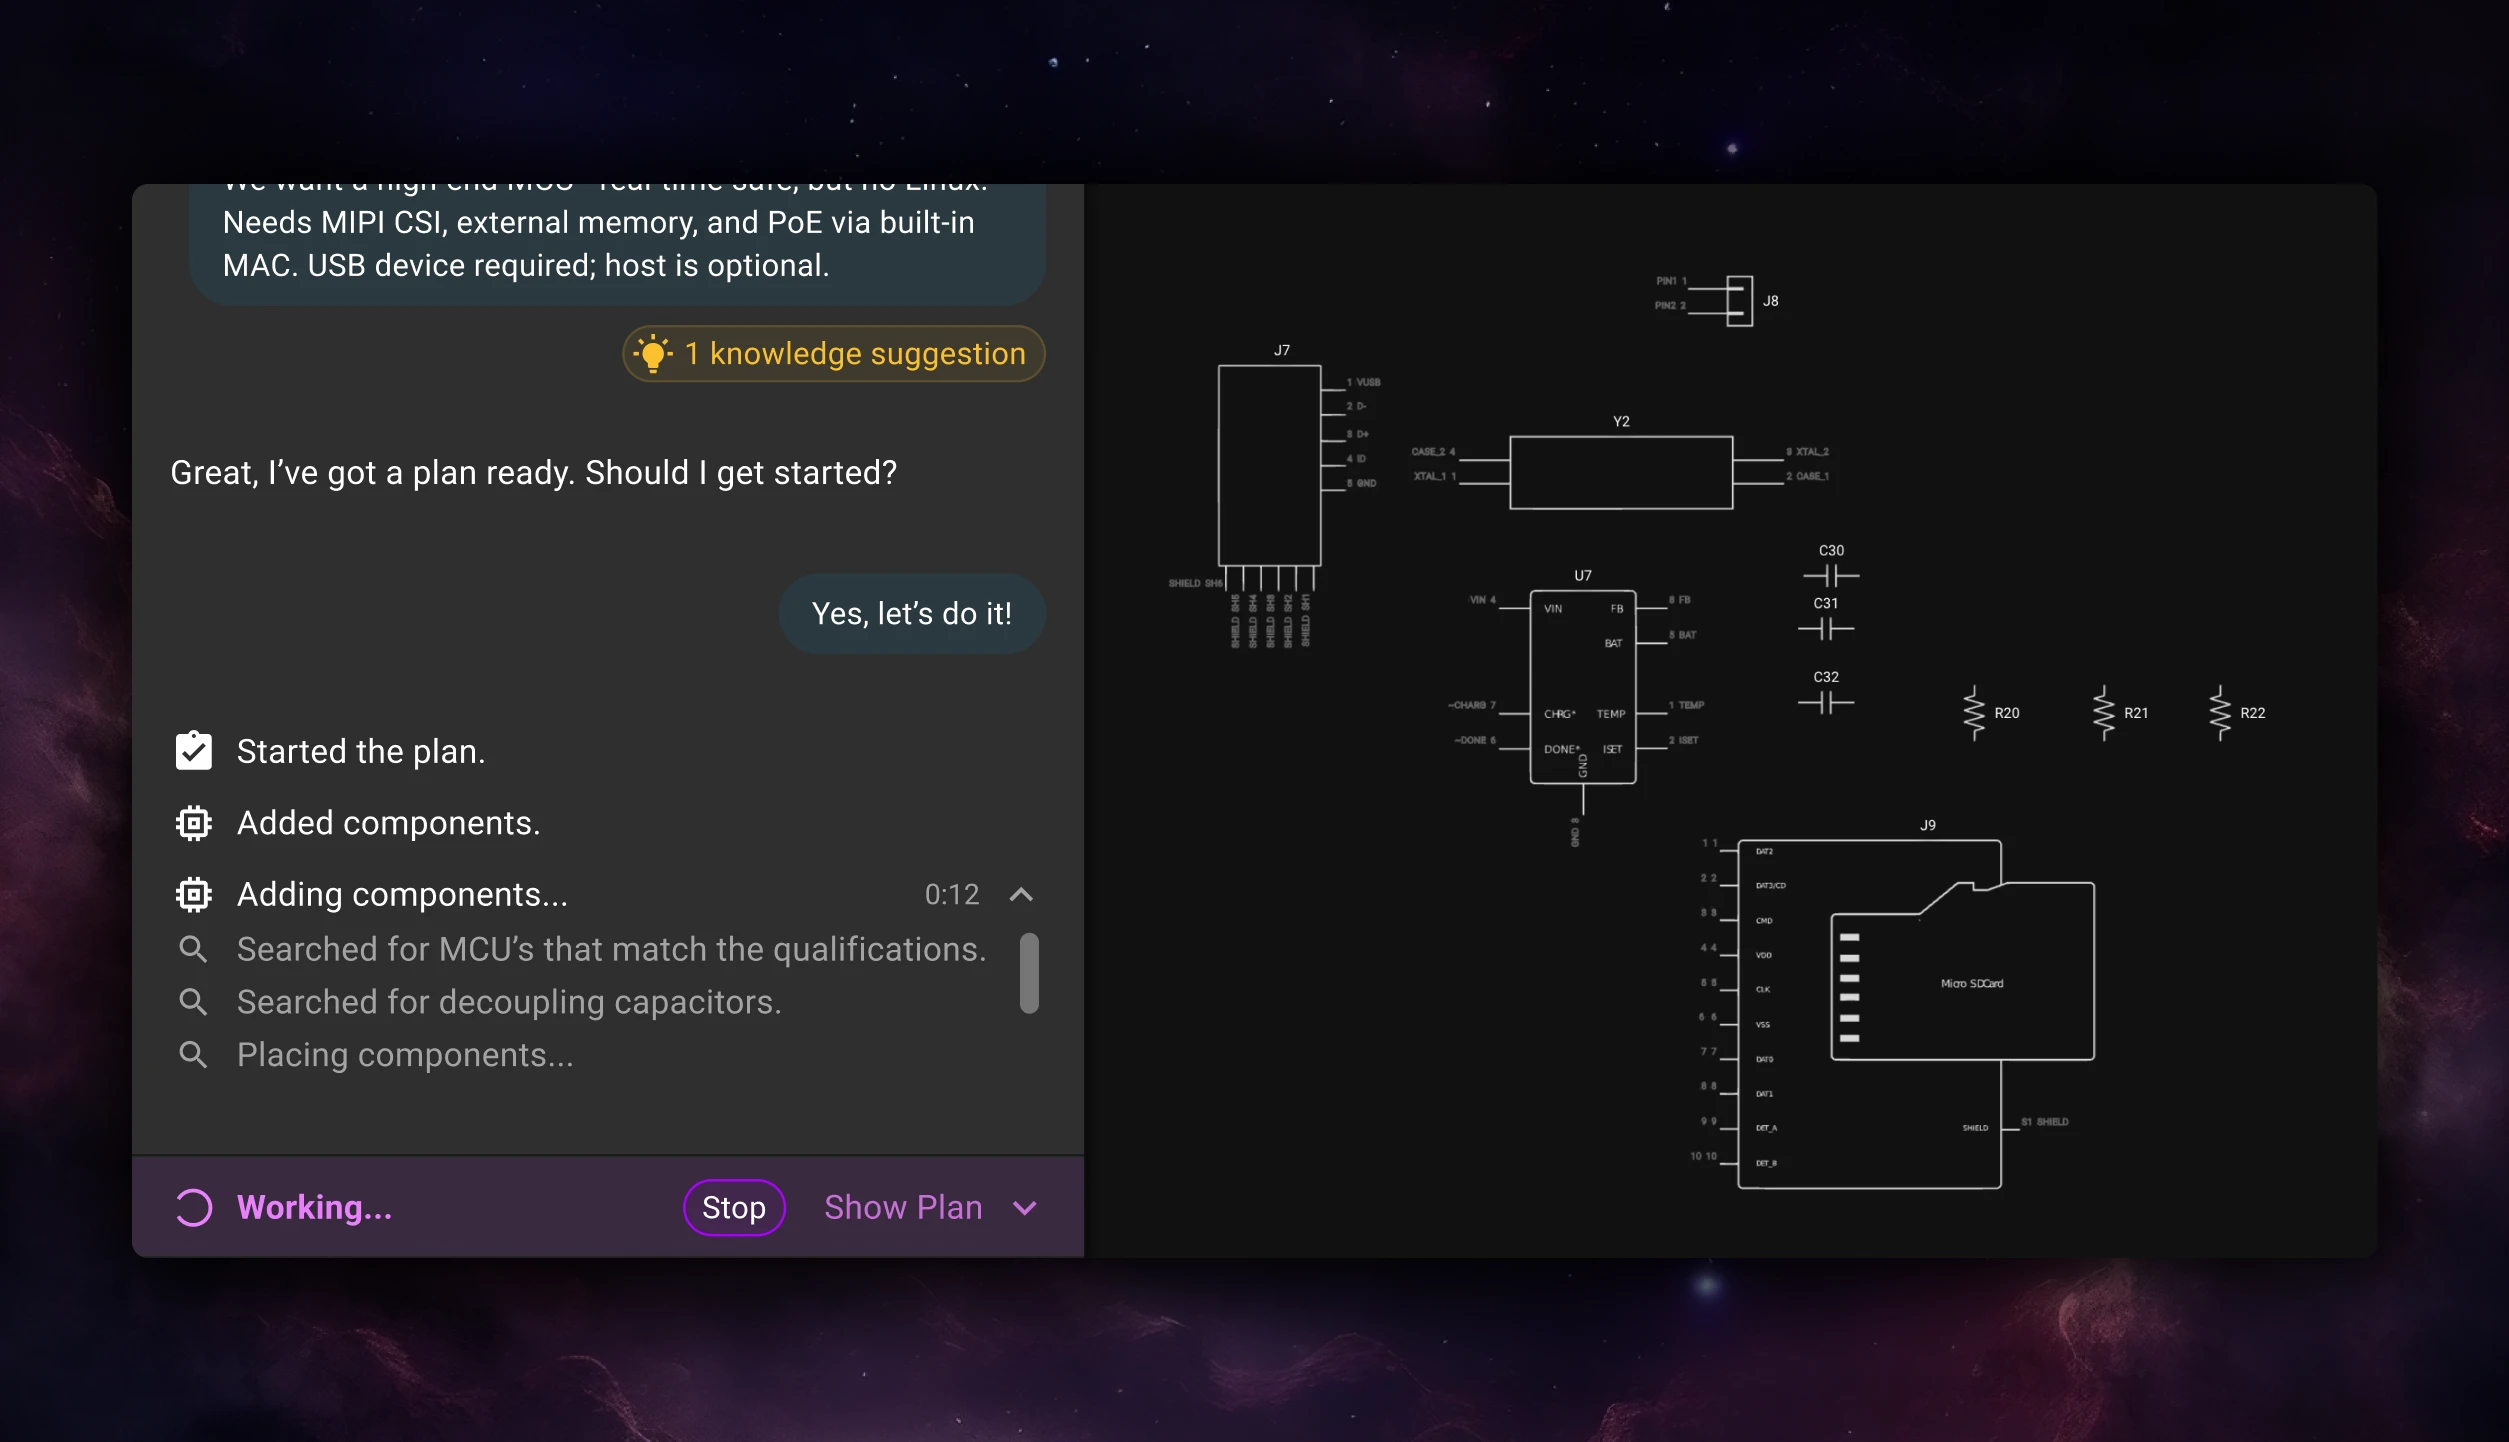
With the architecture in place, pick one block and go deep. This is where you can ask Flux to draft a schematic or layout based on specific inputs and constraints.
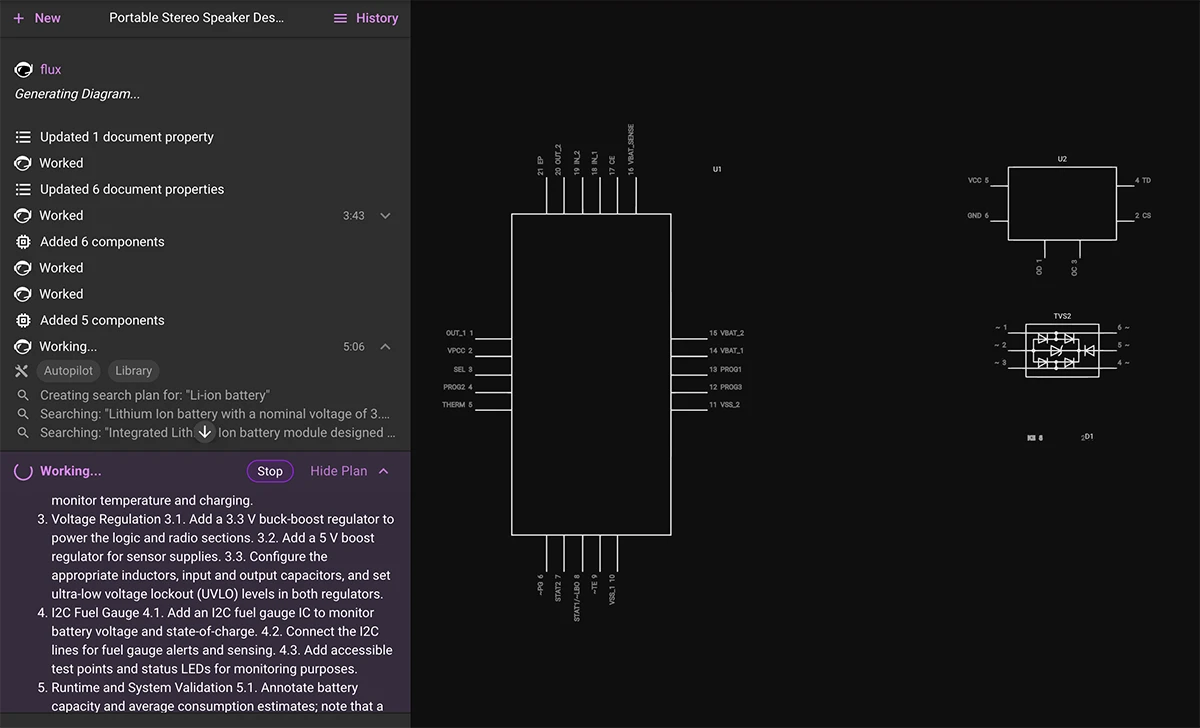
Flux typically works best when you break up schematic generation step by step picking one block at a time and going deep. This is where you can ask Flux to draft a schematic or layout based on specific inputs and constraints.
Flux can research components, place them into the schematic, and wire up the nets for you. Although sometimes the resulting layout might look different than you’d expect, you can always jump in and organize things however you like.
Use this formula:
We’re designing the [block name] for this project.
Inputs:
- [Power inputs and characteristics]
- [Signal inputs, interfaces, or control lines]
Requirements:
- [Functional goals—e.g., voltage regulation, signal processing]
- [Performance targets—e.g., power budget, timing, noise]
- [Constraints—e.g., size, cost, runtime, safety]
Protection:
- [What to protect against—e.g., ESD, reverse polarity, EMI]
Design goal:
- [Overall priority—e.g., efficiency, safety, manufacturability]
Example:
Let's design the power management block.
Inputs:
- 3.7V Li-ion battery (2000 mAh)
- USB-C input for charging
Requirements:
- Charge controller with input current limit and battery protection
- Boost to 3.3 V for digital logic and 5 V for gas sensors
- 48-hour runtime target at ~50 mA average current
- Battery voltage and charge status monitoring via I²C
Protection:
- ESD on USB-C
- Reverse polarity and over-discharge protection
Design goal: Efficient, compact, and safe for consumer use
Tip: Link datasheets or PDFs for reference—Flux can match its design to those specs.
Flux AI operates in two complementary modes—one for exploration, one for precision. Use the planning mode when you’re exploring ideas or starting from scratch. It’s great at figuring out workflows and proposing architectures.
Use the single task mode by disabling planning when you need control—editing one block, fixing small issues, or checking results. To disable planning mode, hover over the AI icon at the bottom of the chat menu and click on “disable planning”.
After helping hundreds of users in the Flux Slack community, we’ve noticed some common stumbling blocks when working with the AI. Most of these are easy to fix once you know what to look out for.
Here are a few patterns to avoid:
The earlier you correct course, the faster you get to a working design.
Flux’s AI is improving fast, but there are still a few areas where you may need to step in. We want to be upfront about what’s working well—and what still needs a human touch.
Here’s what to expect:
Known limitations:
Flux is rapidly growing its AI capabilities to support:
Every great board starts with a clear idea. Whether you’re designing your first schematic or refining a production layout, better prompting leads to better results.
Use this guide to help Flux work like the engineering intern you’ve always wanted—fast, reliable, and just a prompt away.
Flux moves from one-off actions to executing multi-step workflows including researching parts, creating schematic designs, placing and routing, and running checks. Think of Flux as a capable intern — fast, explainable, and eager to learn, but still needing oversight and occasional help.
With this release, Flux can take your requirements, generate a complete plan, and execute multi-step workflows right inside the editor. It researches components, builds schematics, places and routes parts, and runs checks along the way — pausing for your feedback when it needs direction.
Think of it as your first AI intern: fast, explainable, and eager to learn — but still guided by someone who knows the craft. Flux works transparently, explains its reasoning, and remembers how you like to work.
It’s the biggest step yet toward the first true AI hardware engineer.
This new functionality is available now. Log in to Flux today to take it for a spin. Full workflow capabilities will roll out gradually over the coming days.
Start by telling Flux what you need to build. Flux now understands design requirements—the goals, constraints, and specs that define your project. Describe the functionality, power targets, interfaces, layer count, or components you want to use, and Flux will turn that into a complete, step-by-step plan.
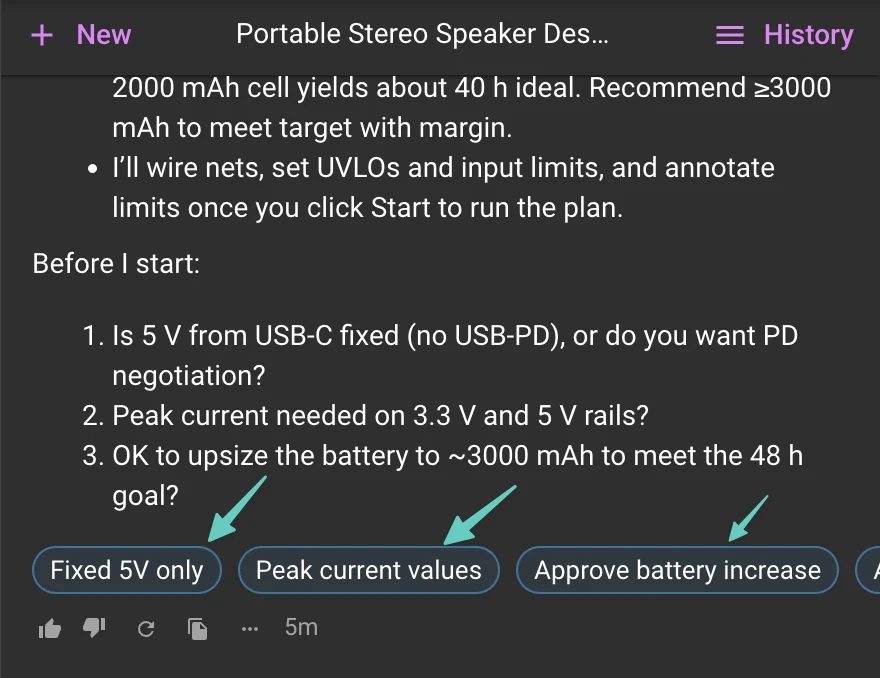
You’ll see a clear outline of the plan: parts research, schematic creation, layout, checks, and milestones for review. From there, simply tell Flux about any desired changes—add details, reorder tasks, or lock decisions—and it will refine the plan for you. It’s up to you how in the weeds you get.
Next, click “Start” and Flux will begin get to work, sharing progress and decisions along the way, and checking in with you at key points to get your feedback.
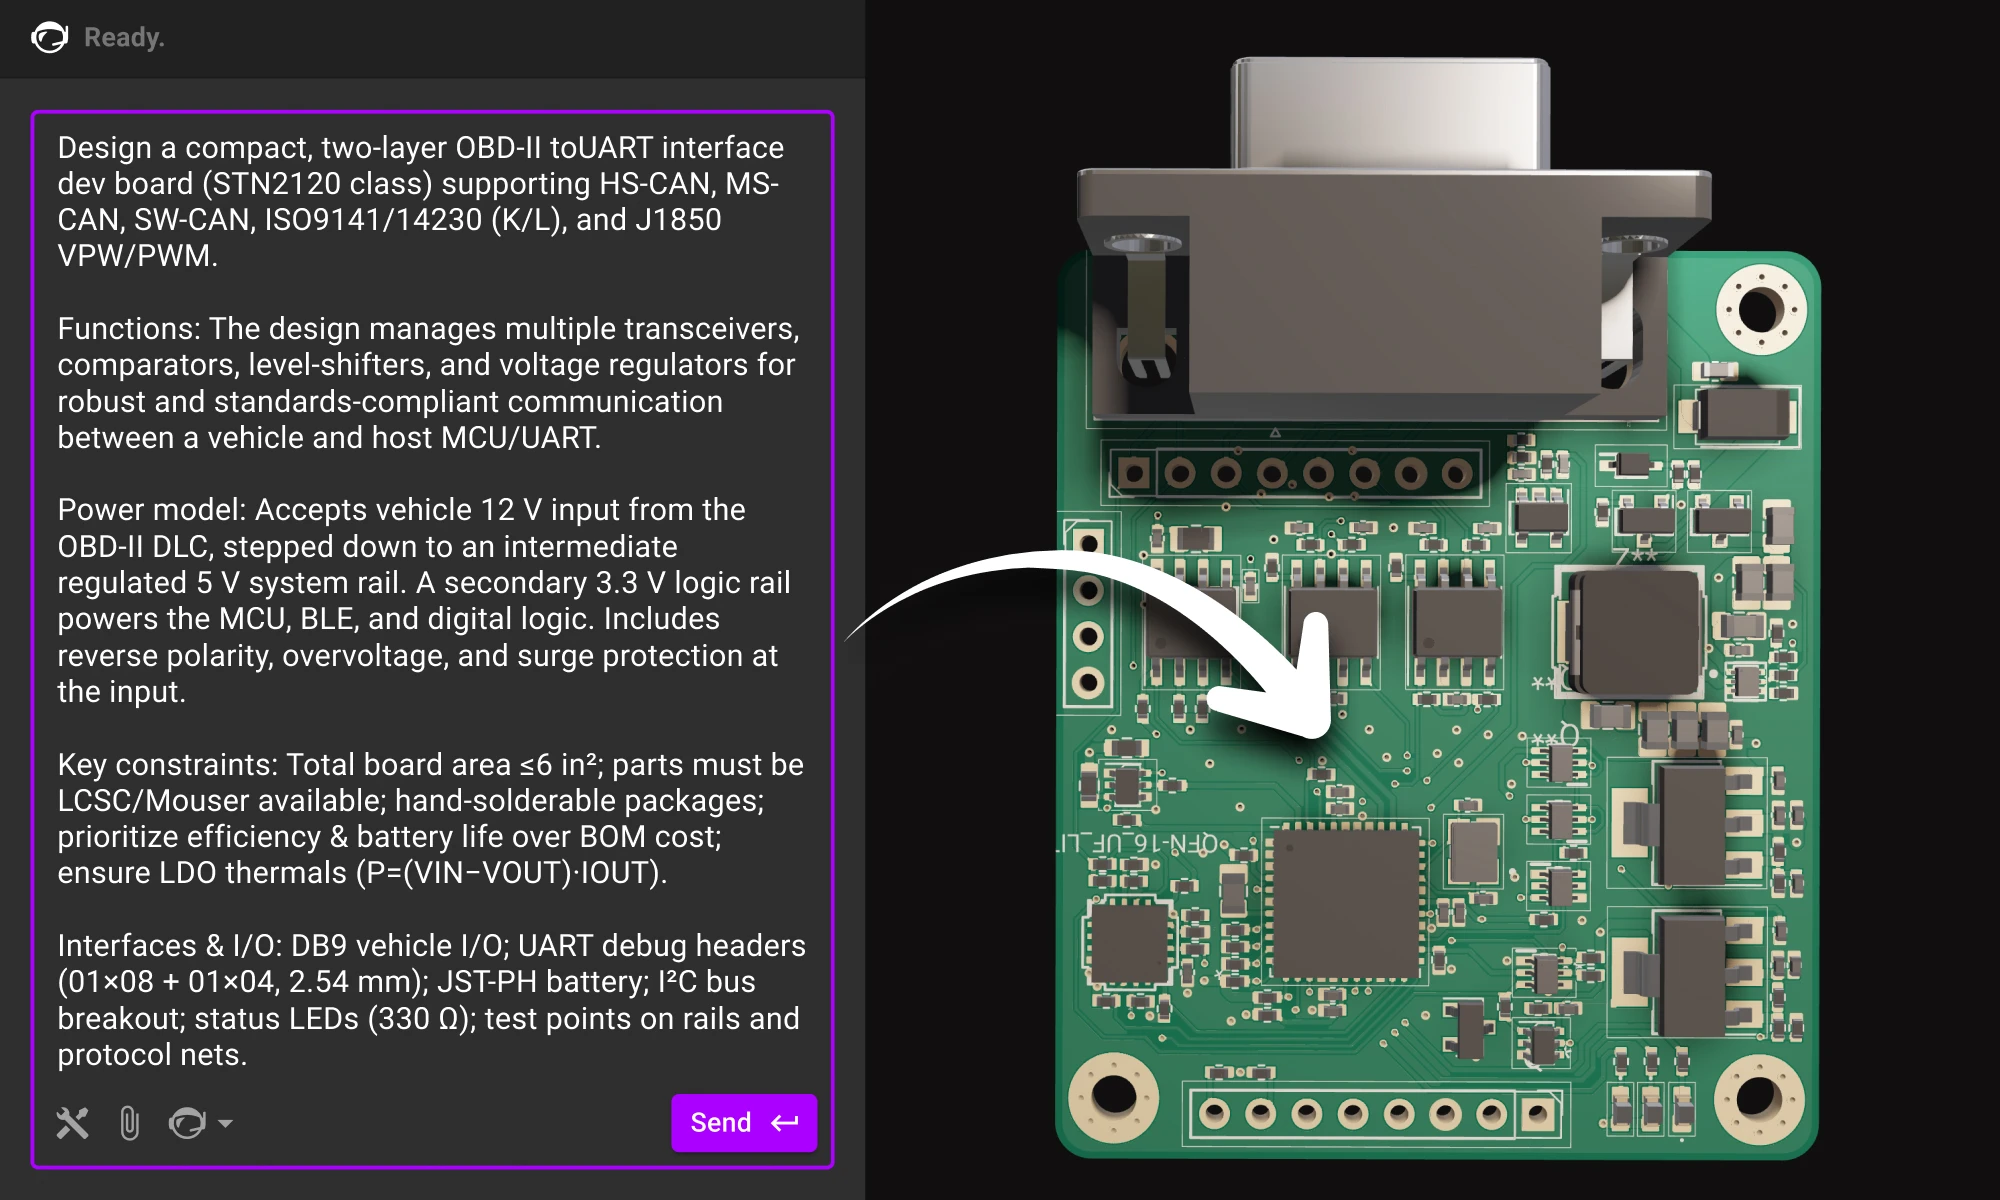
“Design a sub-25 × 25 mm wearable PCB with Bluetooth, an accelerometer, and on-board battery charging.
It must include a BLE SoC (OTA-capable), a low-power accelerometer with interrupt/wake, power-path + charging for a 1-cell Li-ion/LiPo, and headers/pads for programming and test.
Power: 1-cell Li-ion/LiPo with on-board charger (5 V USB input) optimized for low quiescent current.”
{{button-1}}
“Design a compact field-oriented control (FOC) BLDC motor driver board.
It must include Bluetooth Low Energy for wireless control and data-logging.
The key subsystems are: power stage and gate drive, sensing, MCU selection, comms, and protection to thermal/mechanical stress.
Power: USB-C PD at 12 V (with local regulation as required).”
{{button-2}}
“Design a low-noise electret microphone preamplifier for a 24-bit ADC, integrated into a consumer household device.
It must have switchable 20–40 dB gain, correctly sized coupling capacitors with a ~20 Hz high-pass, an output anti-alias RC for ~20 kHz bandwidth, and thorough decoupling plus pop-suppression.
Follow the op-amp, microphone, and ADC datasheets and industry best practices; use the 3.3 V analog rail and make cost-effective component choices without asking for spec confirmation.
Power: USB-C 5 V input (with local regulation as required).”
{{button-3}}
When you approve a plan, Flux doesn’t just hand you suggestions—it gets to work.It now executes full workflows inside the editor, acting like an extension of your team that can solve real problems while keeping you in the loop.
Flux handles the structured parts of the process—researching components, wiring schematics, placing and routing parts, and reviewing its own work for correctness—while you focus on the decisions that need human judgment.
You can think of it like having an intern on your team who works fast, communicates clearly, and never forgets a detail. Feel free to close your browser or go for a walk, Flux will keep working in the background, and drop you a line when it’s time to check in.
Flux is built for collaboration. Every plan, action, and decision it makes is visible and explainable so you can review, guide, and adjust as it goes.
You can pause execution, modify the plan mid-flow, or roll back using version history. Lock regions, nets, or components to prevent changes, or ask Flux to revisit a specific step. And because Flux runs inside a full browser-based ECAD, you can jump in and edit anytime—make manual tweaks, move parts, or add your own changes without breaking its flow.
Flux doesn’t just follow instructions—it learns through your conversations and feedback. When you correct something or clarify how you like to work, Flux can ask if you want to remember it. You choose whether that learning should apply just to the project you’re in or across your entire account.
Over time, Flux picks up the same kind of tribal knowledge your team already shares—naming conventions, layout habits, design rules—and starts applying them automatically. You can refine what it remembers, edit entries, or forget things entirely through the Knowledge Base.
It’s how you teach Flux to work the way you do—so it keeps getting smarter, faster, and more aligned with your standards. Learn more.
The new planning and execution architecture inside Flux is designed to scale—so the agent you’re working with today will keep getting smarter and more capable over time.
This is just the beginning. You can already fork your projects and have Flux explore multiple directions in parallel. Soon you’ll be able to delegate even broader, more complex, assignments to Flux, and have it build even more advanced boards.
We envision a future where Flux is not just one AI intern, but a coordinated group of AI engineers, each with their own specialization, that seamlessly integrate with your team. The endgame is a world where hardware teams are infinitely scalable: totally parallel, deeply collaborative, and still human-led.
Hardware is entering a new era—where AI becomes part of the team, instead of part of the toolkit.
It starts here. Give Flux a job, review the plan, and help define how engineers and AI build hardware together.
{{try-plans-ai-workflows}}
Hardware raises the stakes, iteration is slower and costlier, so you can’t stumble on business basics or customer insight. Winning teams de-risk the business model and iterate fast. This bookshelf helps sharpen judgment and give technical founders the tools to build companies people love.
Here’s the hard truth: most hardware startups don’t fail because they can’t build a prototype or find a manufacturer. While still difficult, technical execution is getting easier every year—modern tools, AI included, are streamlining that part of the journey. What kills most teams are the missed fundamentals:
Hardware raises the stakes because iteration is slower and costlier. You can’t afford to stumble on business basics, design fundamentals, or customer insight. The teams that win are the ones that maximize their rate of learning—by de-risking the business model while iterating the product as fast as possible.
That’s why we put together this bookshelf. It’s not just about engineering or manufacturing (though you’ll find the best guides here). It’s about sharpening judgment, broadening perspective, and giving technical founders the tools to build companies people love.
For hardware founders, the hardest part usually isn’t the prototype—it’s building the company around it. These books focus on judgment, focus, and leadership: how to move fast without losing clarity, protect the details that matter, and make the calls that keep a small team alive. They’re about operating at founder speed when time, money, and attention are always scarce.
{{book-set-1}}
{{underline}}
Hardware doesn’t forgive sloppy execution. Once you leave the lab, mistakes multiply—costs rise, timelines slip, and quality issues get baked into production. These books help founders treat manufacturing as part of the product itself: learning to engage suppliers early, de-risk decisions, and build systems that scale without collapsing under their own weight.
{{book-set-2}}
{{underline}}
Every hardware founder eventually gets burned by the basics. Power rails, grounding, EMI, provisioning flows—these are where folklore and half-remembered rules can cost you entire boards. These books turn “tribal knowledge” into principles you can rely on, helping you avoid expensive surprises and design products that actually hold up in the field.
{{book-set-3}}
{{underline}}
Great hardware isn’t just about circuits and enclosures—it’s about making something people actually want to use. These books teach the fundamentals of design thinking, product discovery, and usability. For hardware founders, they’re the bridge between technical execution and customer love—the difference between a product that works and a product that wins.
{{book-set-4}}
{{underline}}
Building hardware is a long, uncertain grind. Sometimes what you need isn’t another playbook—it’s proof that others have walked this road before. These books capture the culture, discipline, and stubbornness of teams who built under pressure, kept their vision intact, and shipped work that mattered.
{{book-set-5}}
{{underline}}
These books shape how we think at Flux, but the real progress comes from learning together. That’s why we created the Flux Hardware Slack Community. It’s where founders connect to:
You can also book design reviews with the Flux team to receive actionable feedback before you head to production. Please let us know if there are other resources you’d like us to provide that could your hardware startup become a massive success! We’re here to help.